Introduction
This post is not a step-by-step tutorial, but more like a documentation of a Material Function I created. However, it does contain screenshots of the entire graph, so feel free to recreate your own version.
I’m currently working on a simple billboard baker that bakes the various GBuffer layers as textures using Render Targets, which can then be used in conjunction with a plane and a material that makes it always faces the camera.
Of course, the material needed some logic that rotates the plane to align it toward the camera, I wanted a function that would deal with calculating both the World Position Offset and the correct Normals. There are a lot of different ways to achieve this, I found a lot of resources online about it and after some exploration, I gathered together the logic needed for 2 types of billboards:
- Free Rotation
- Z-Axis Constrained
Geometry Plane Setup
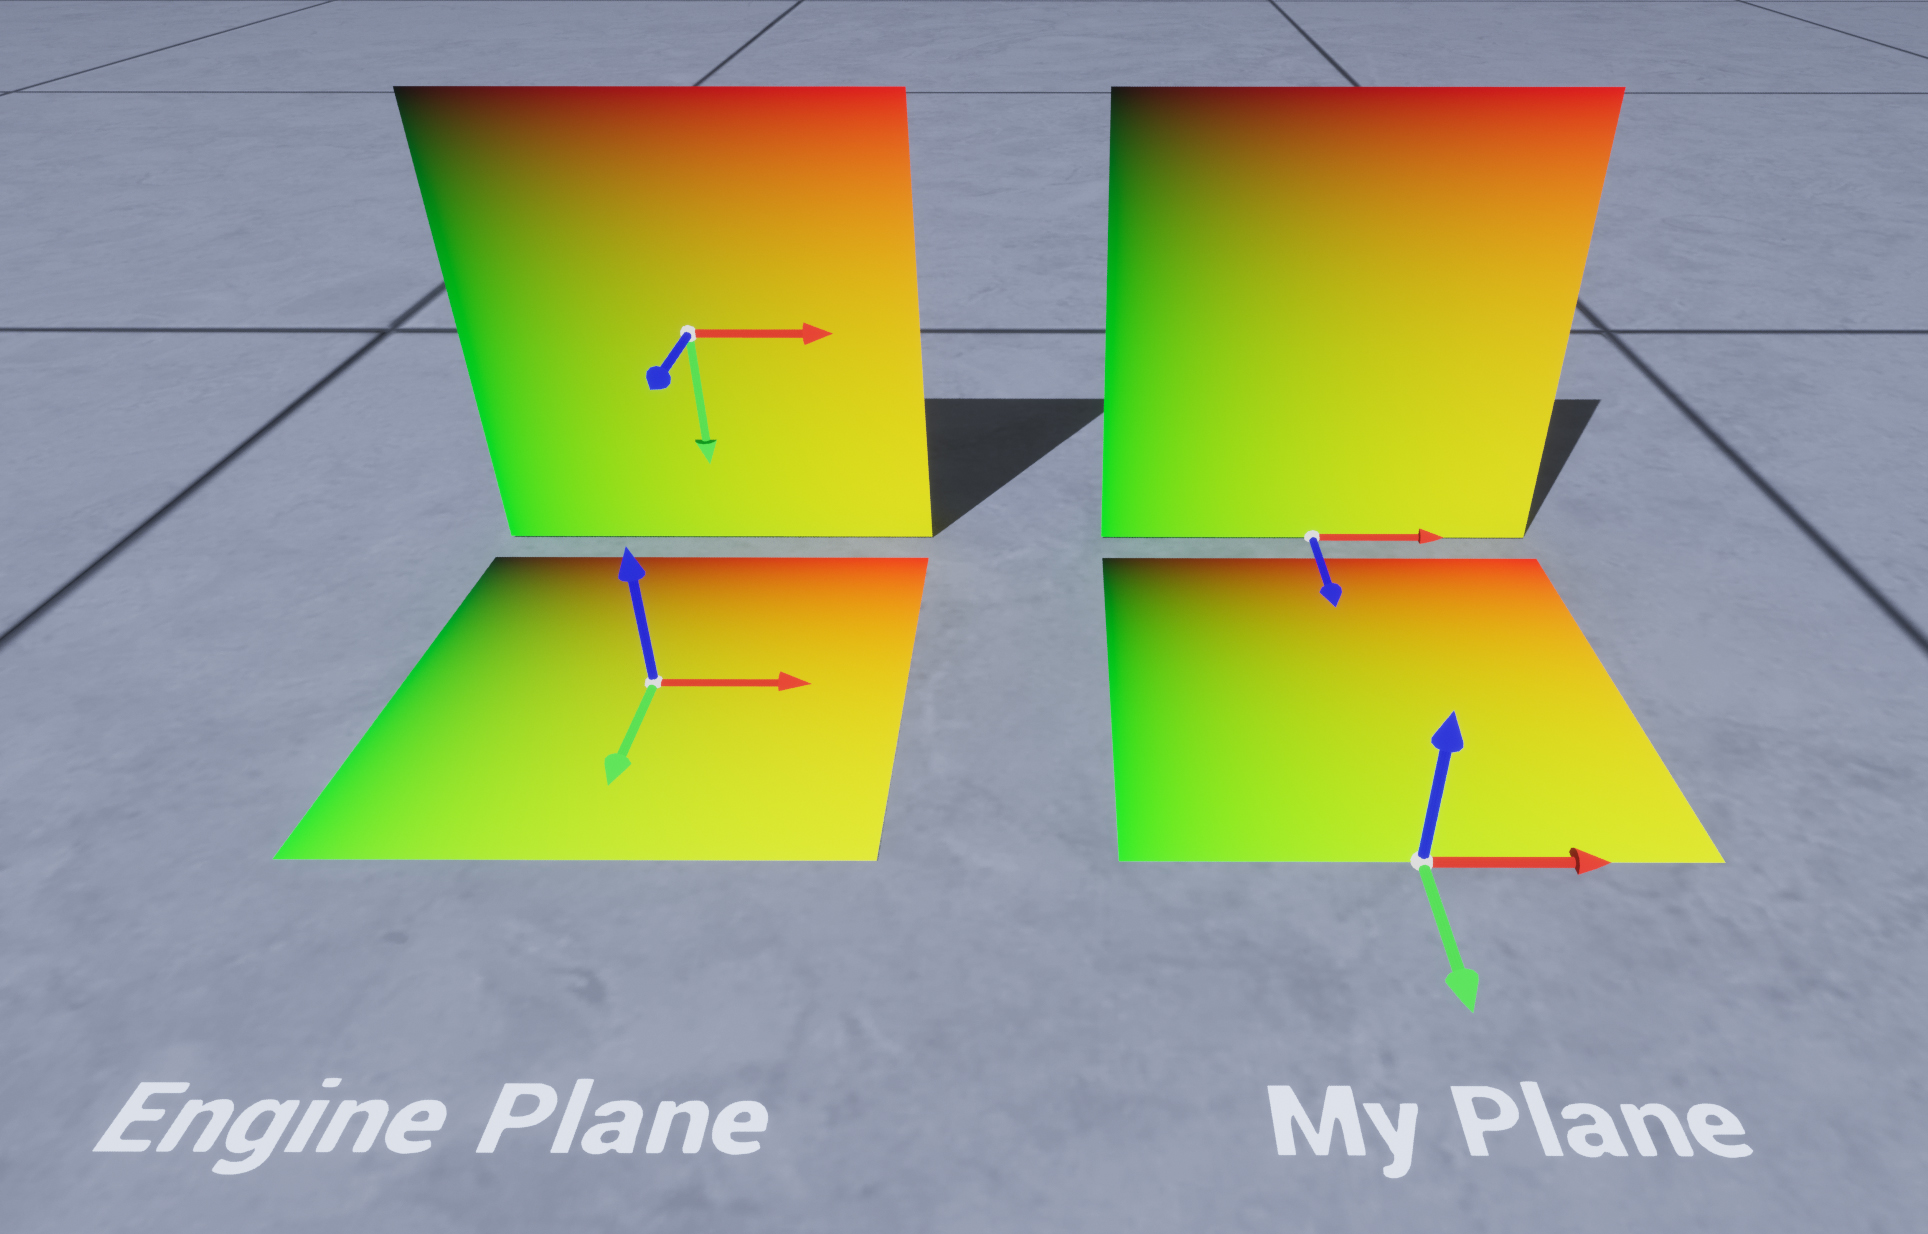
Both logics are set up to work with the default engine plane rotated by 90 degrees on X, but you can make your own one, the only thing to be careful about it’s the plane orientation and UVs.
For example, I made a version where the pivot is at the bottom so that it’s easier to place it around the scene.
The Function
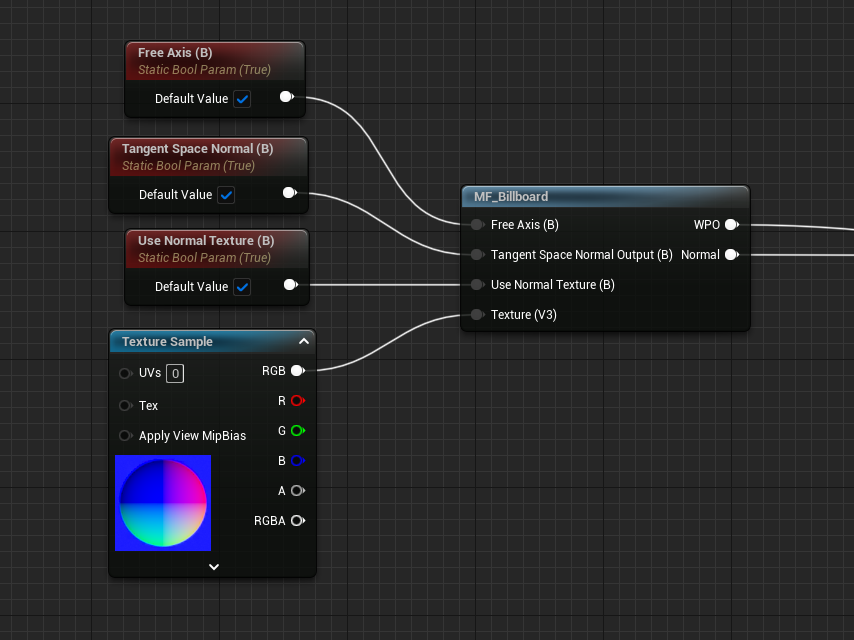
Here’s the graph:
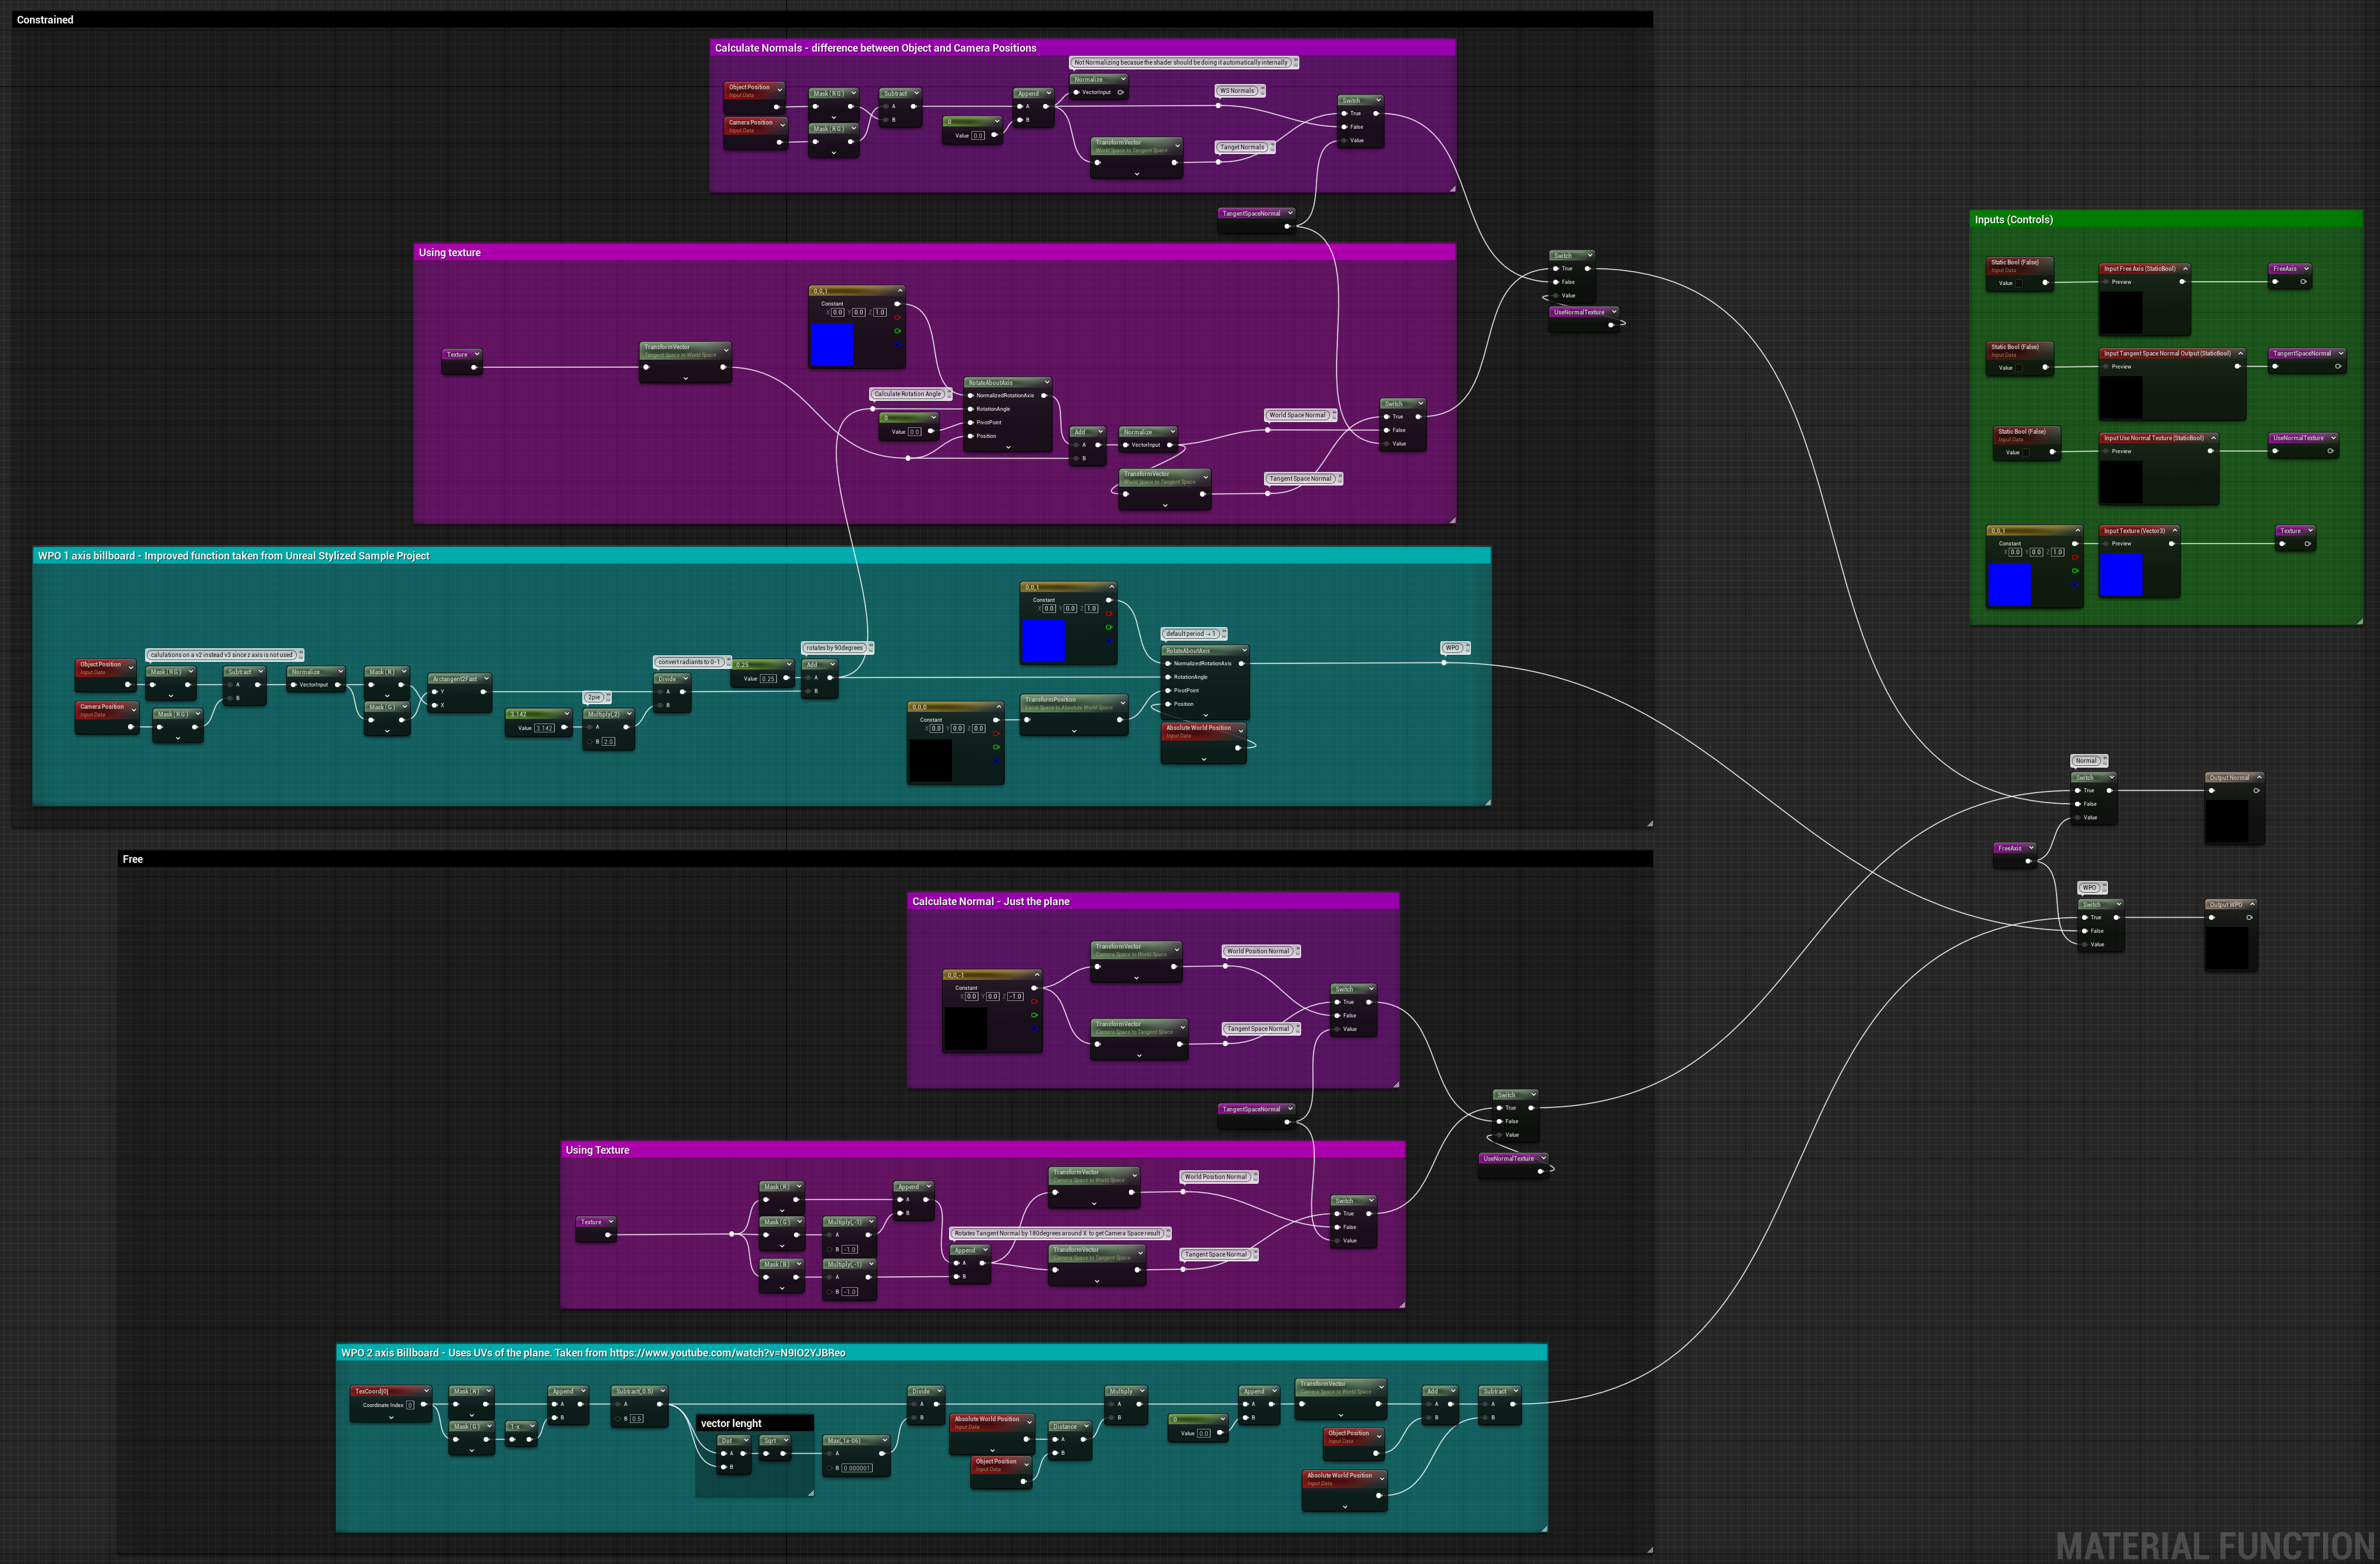
It’s divided into 2 parts, one logic makes the plane face the camera from all angles (Free Rotation), while the second one has the plane’s Z-Axis locked so that it doesn’t pitch (Z-Axis Constrained). For both versions, there is a switch that calculates the correct normals with and without using a texture.
The function outputs both the WorldPositionOffset and Normal to plug into the Material Attribute.
Inputs
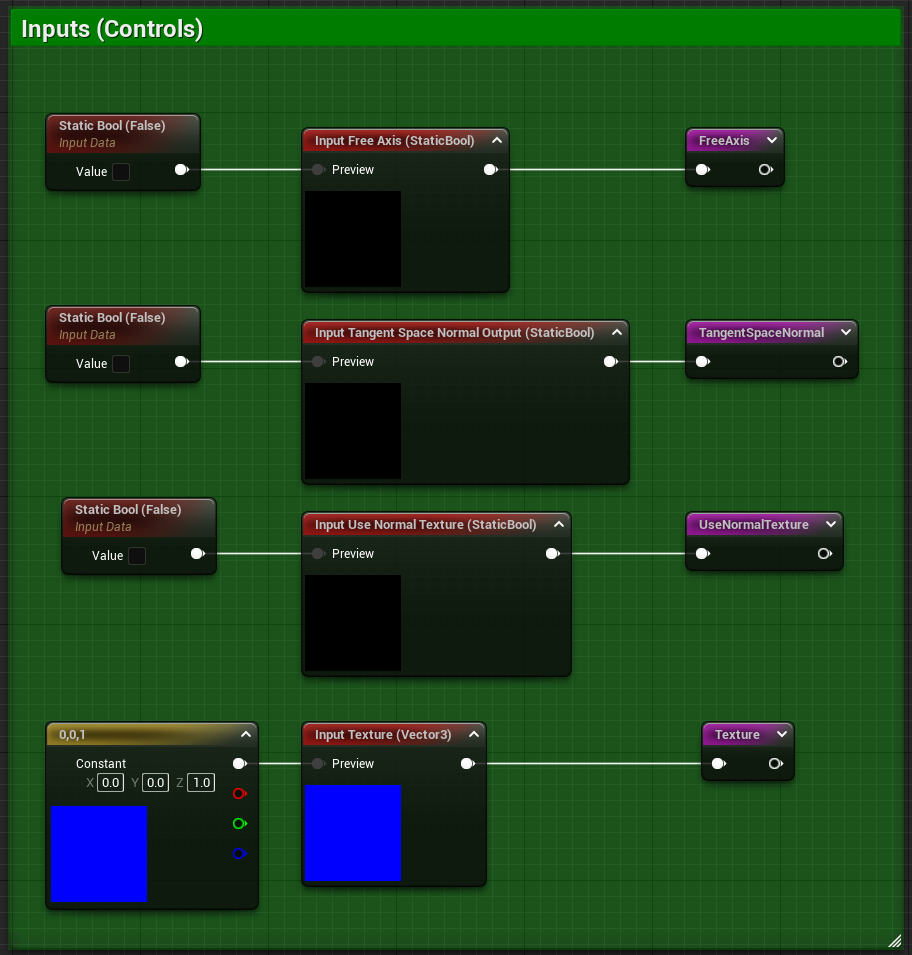
The function has 4 inputs, one of them is a Vector3 for the texture input, while the other 3 are booleans that toggle various switch nodes.
Here’s a description of each of them:
- Free Axis (StaticBool) → Whether or not the function should use the Free Rotation or the Z-Axis Constrained logic
- Tangent Space Normal (StaticBool) → Defines if the output Normal should be in Tangent Space or World Space
- Use Normal Texture (StaticBool) → Tells the function if you’re feeding a Normal Texture, or if it should calculate only the Normals of the plane
- Texture (Vector 3) → Tangent Space Normal Texture input
Free Rotation Method
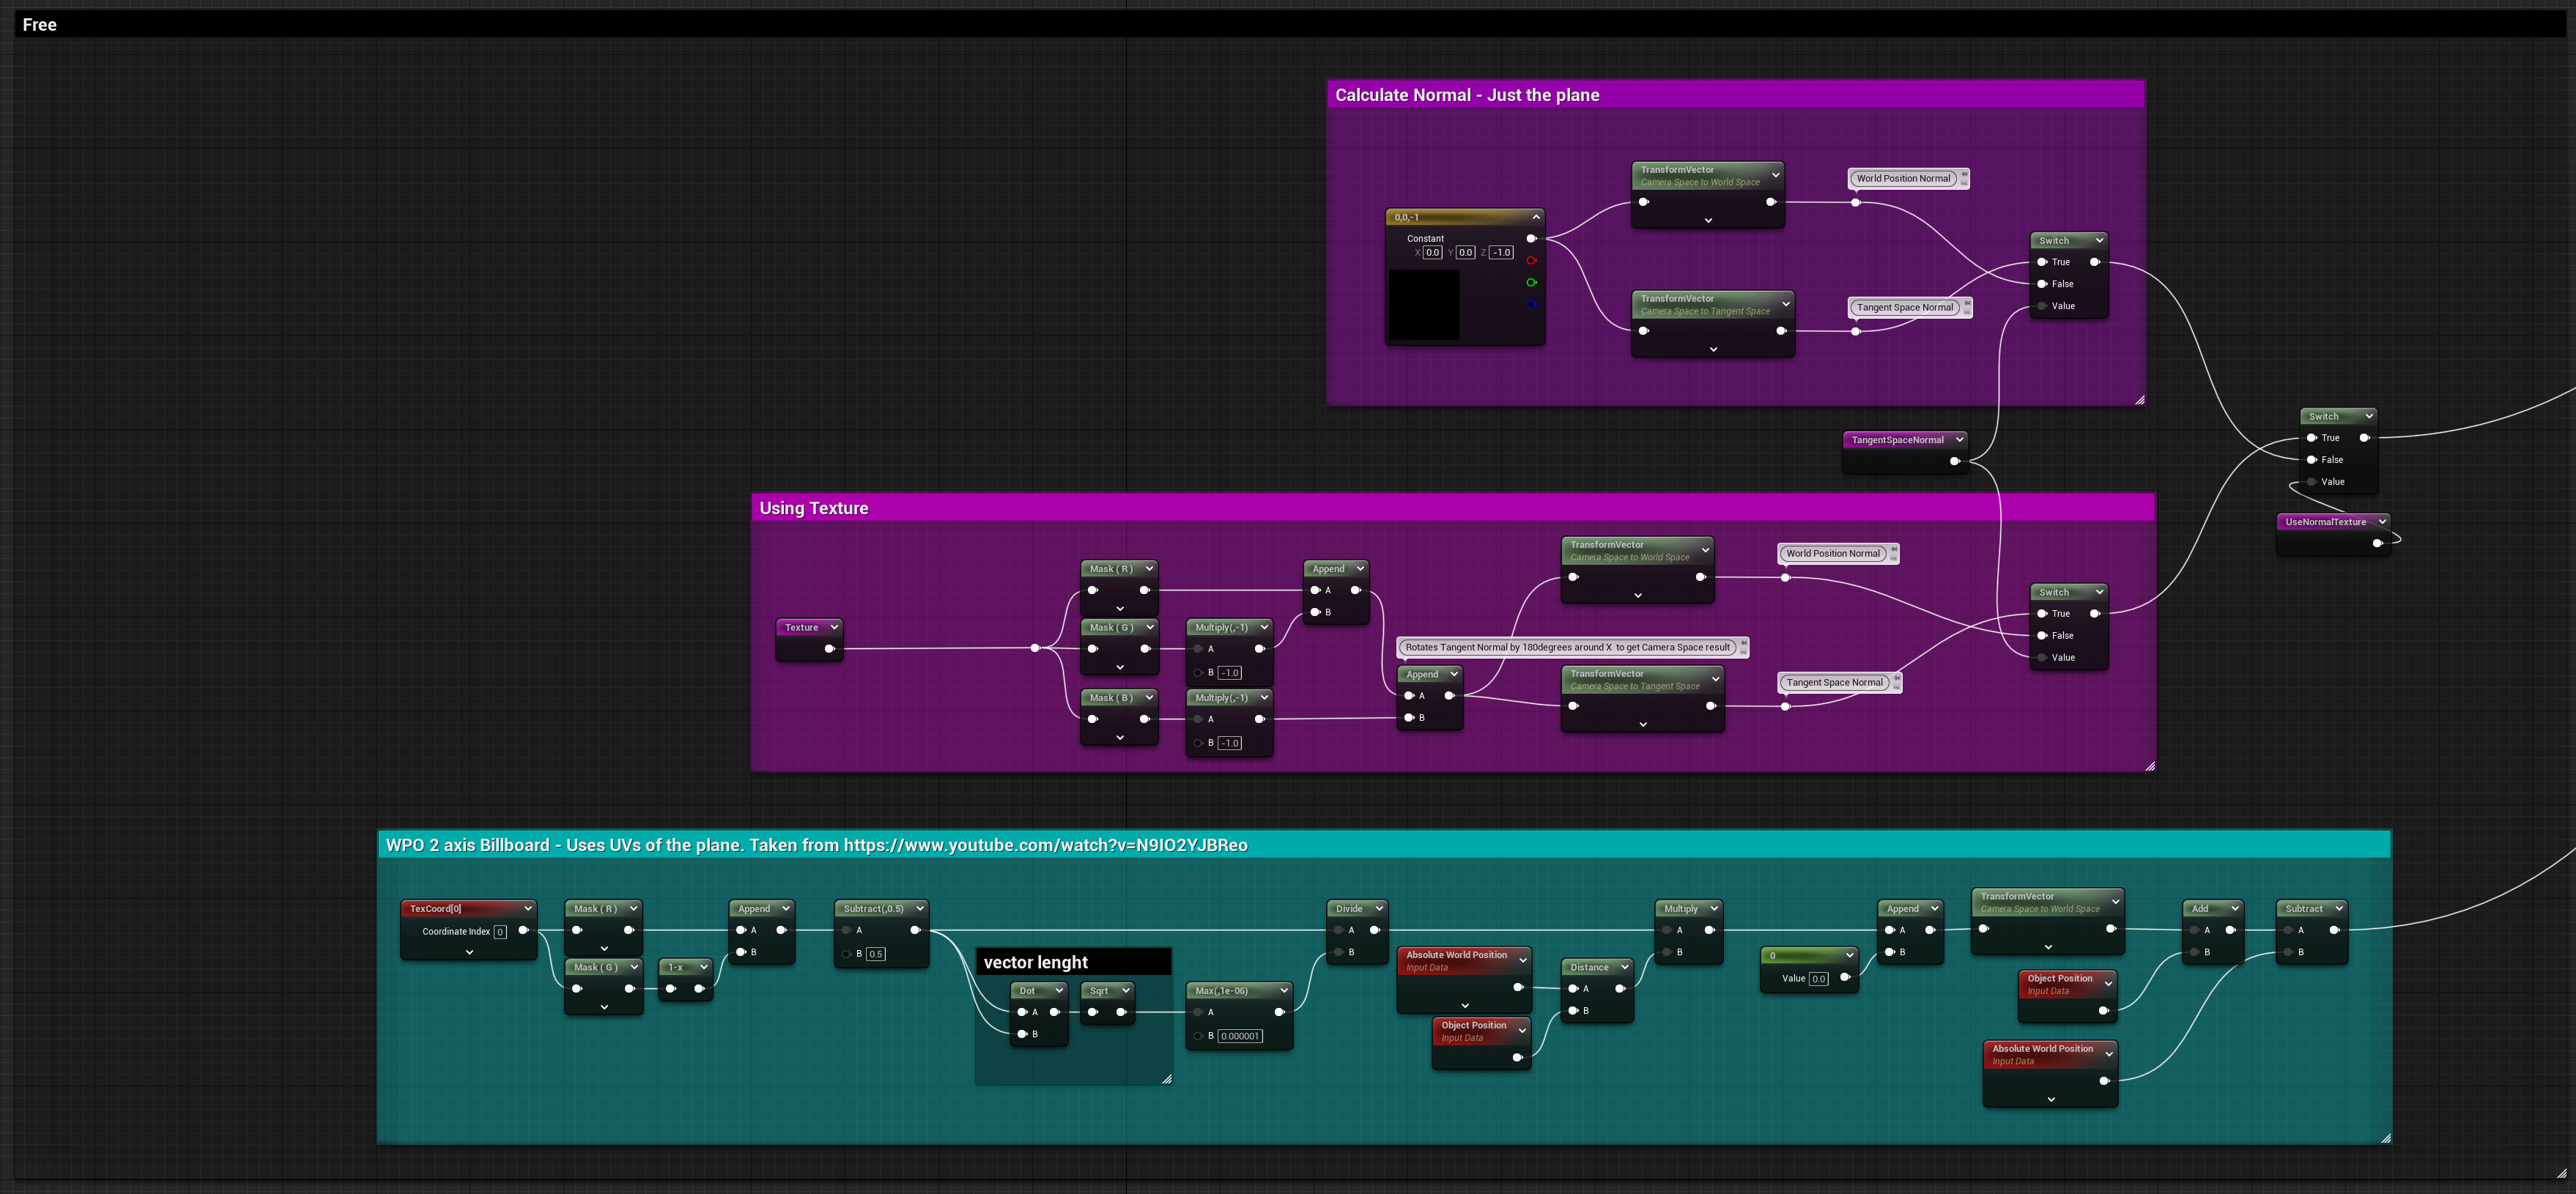
For the free rotation setup, I’ve followed the logic showcased by Visual Tech Art YouTube channel in one of his video, I highly recommend it if you want to understand better billboards, his other videos also cover interesting topics in a great way!
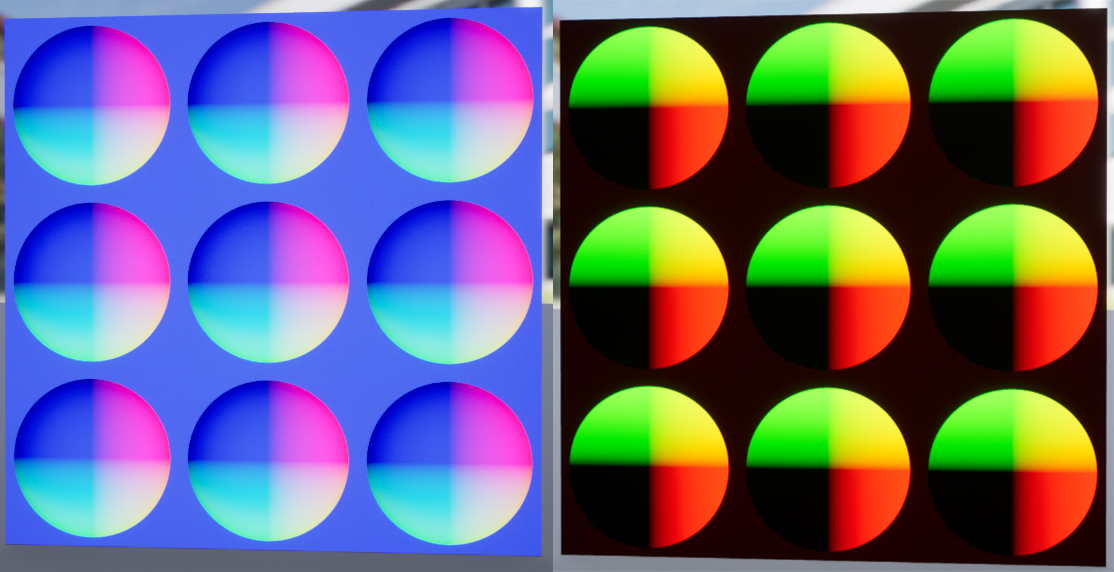
The logic basically takes the UVs of the plane and aligns them to the UVs of the Camera, for the Normals when using a tangent space texture I’ve rotated the vectors by 180 degrees around X to have them as if they were also camera space. I tried to use the TransformVector node set from TangentSpace to CameraSpace but it wasn’t working as expected.
Texture Normals before and after the rotation:
Z-Axis Constrained Method
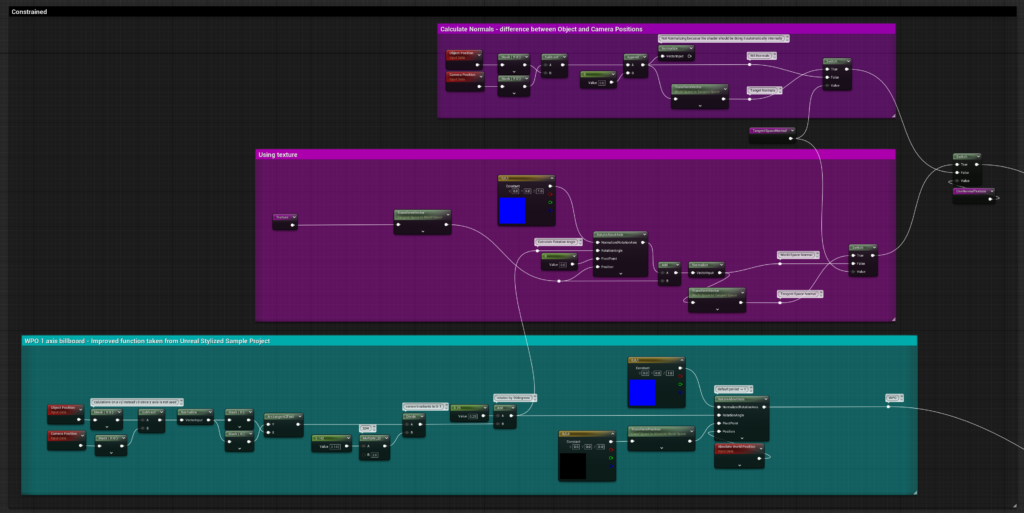
The constrained logic is inspired by Epic‘s stylized sample project, I think I’ve just cleaned it up a little bit and replaced the custom node used for the rotation with “Arctangent2Fast”.
For calculating the correct Normal I’ve followed the same video mentioned before from Visual Tech Art. While for the Texture Normal I’m applying the same rotation done for the WPO.
Conclusion
Thanks for your attention, I’ve always found confusing the fact that you also need to recalculate Normals when using World Position Offset. This exercise, and exploration helped me to have a better understanding of it and I’m now more confident when dealing with Normals.
I hope you’ve found this post useful, have a great rest of the day!
Resources
Here’s a list of the various resources I’ve used during the exploration and development of the function:
- Visual Tech Art Billboard video → great video on which most of my function logic is based on
- Epic Stylized Materials documentation page → good read, also useful for other stylized techniques
- Rotating meshes using Vertex Shaders → Interesting blog post about correctly rotating entire meshes using WPO
- Help with camera facing material → Unreal Forum Post that shows 3 different ways of aligning a billboard to the camera, but his issue is about making them work with foliage painter, my function hasn’t been tested for that yet
- How to make text facing a camera in Unreal Engine → blog post about using “AlignMeshToCamera” function to the text material to have it rotate towards the camera

Leave a Reply