Introduction
Here’s a very simple but quite useful tip for Houdini, let’s say you are working on a landscape and you want to scatter some random rocks on it, in this post I’ll show you how you can do that!
To achieve this we need to give a unique ID attribute for each object you want to scatter and then use a Copy to Points node.
In the example I’m going to show you, the unique ID will be called variant.
Objects Pool
Let’s start by putting together all the objects we want to randomly pick from, creating an “Object Pool” that we can use later to reference the objects.
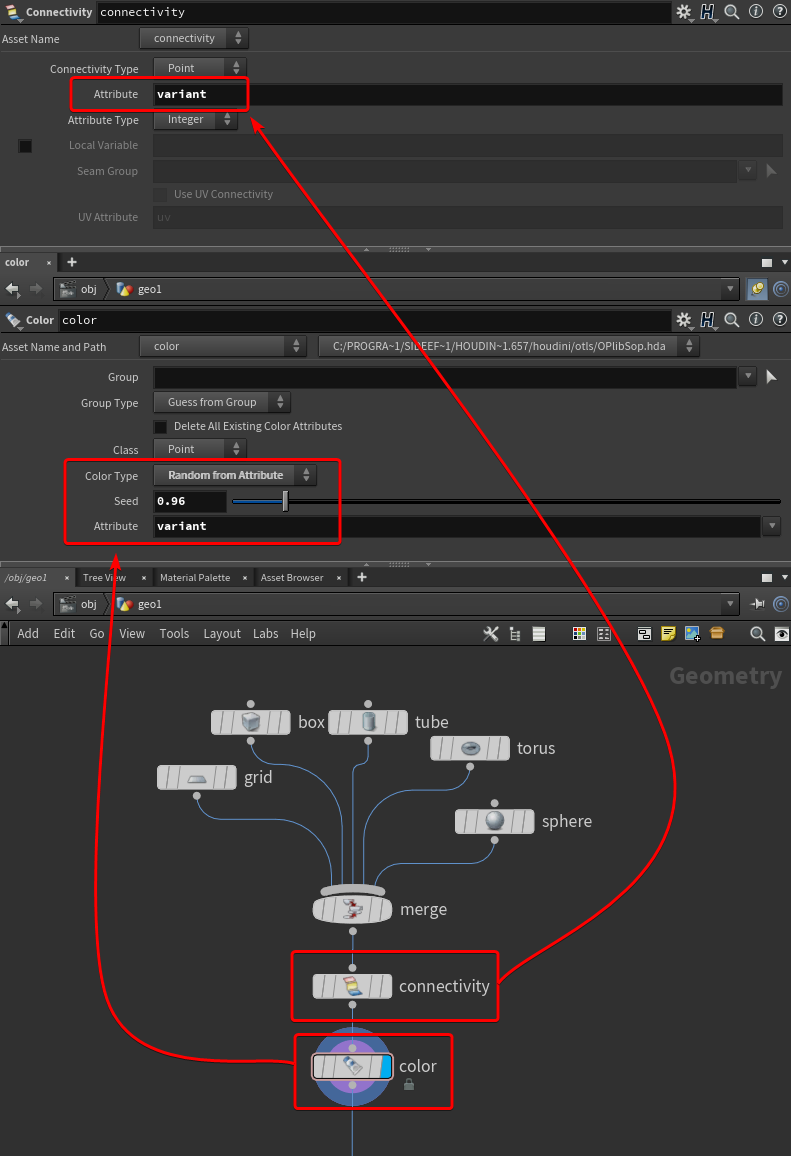
The only thing we need is to give them a unique integer attribute. If all the objects are made out of single meshes then we can easily use a Connectivity node.
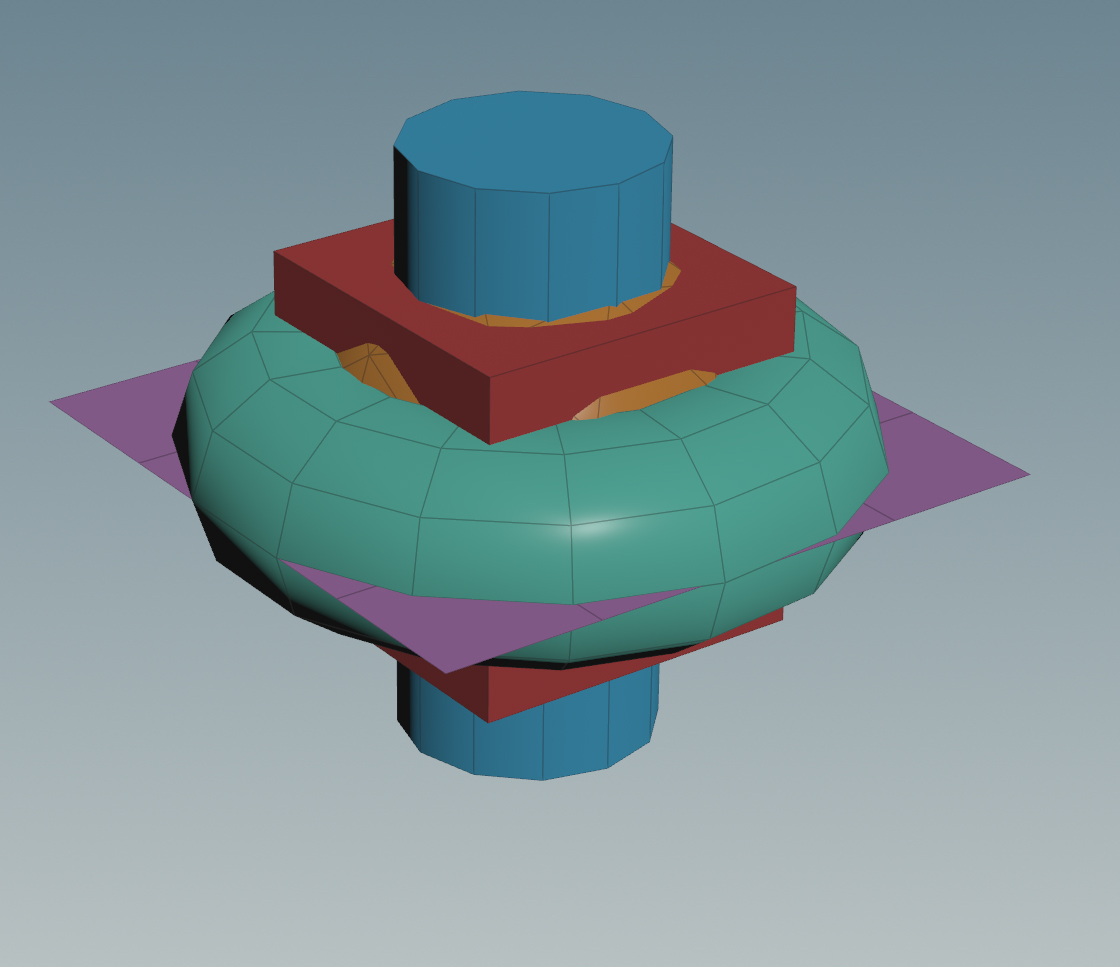
In the example below I used this node, only changing the default name it creates from “class” to “variant”, and then I’m driving a color node to pick a random value using this attribute:
However, if your object is composed of multiple meshes, like Houdini’s test geometry Rubber Toy is, this won’t work since the Connectivity node creates the attribute for each set of connected primitives or points.
You would get this result instead:
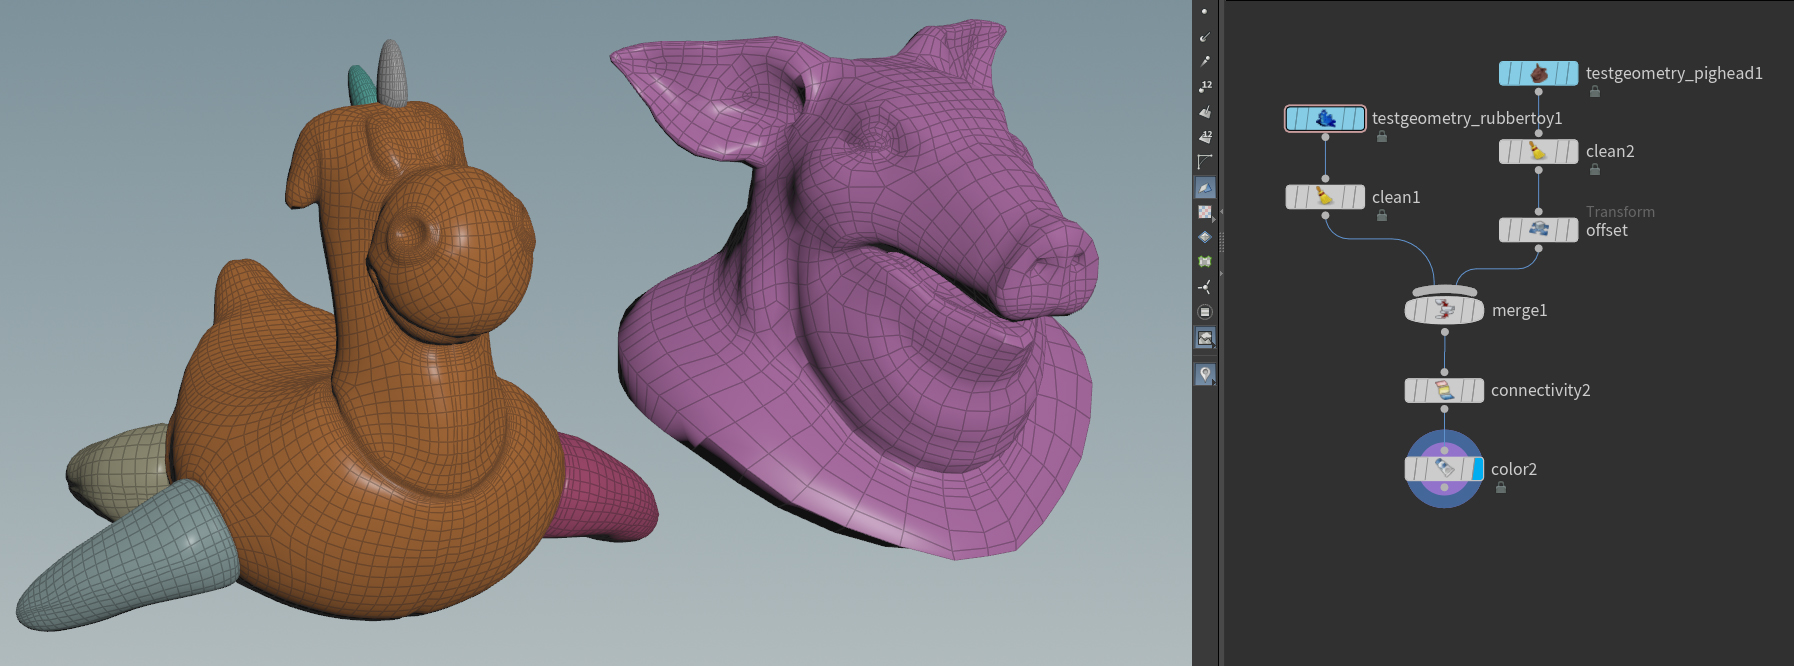
I found two alternatives to this problem, but please reach out if you know a better way of doing this.
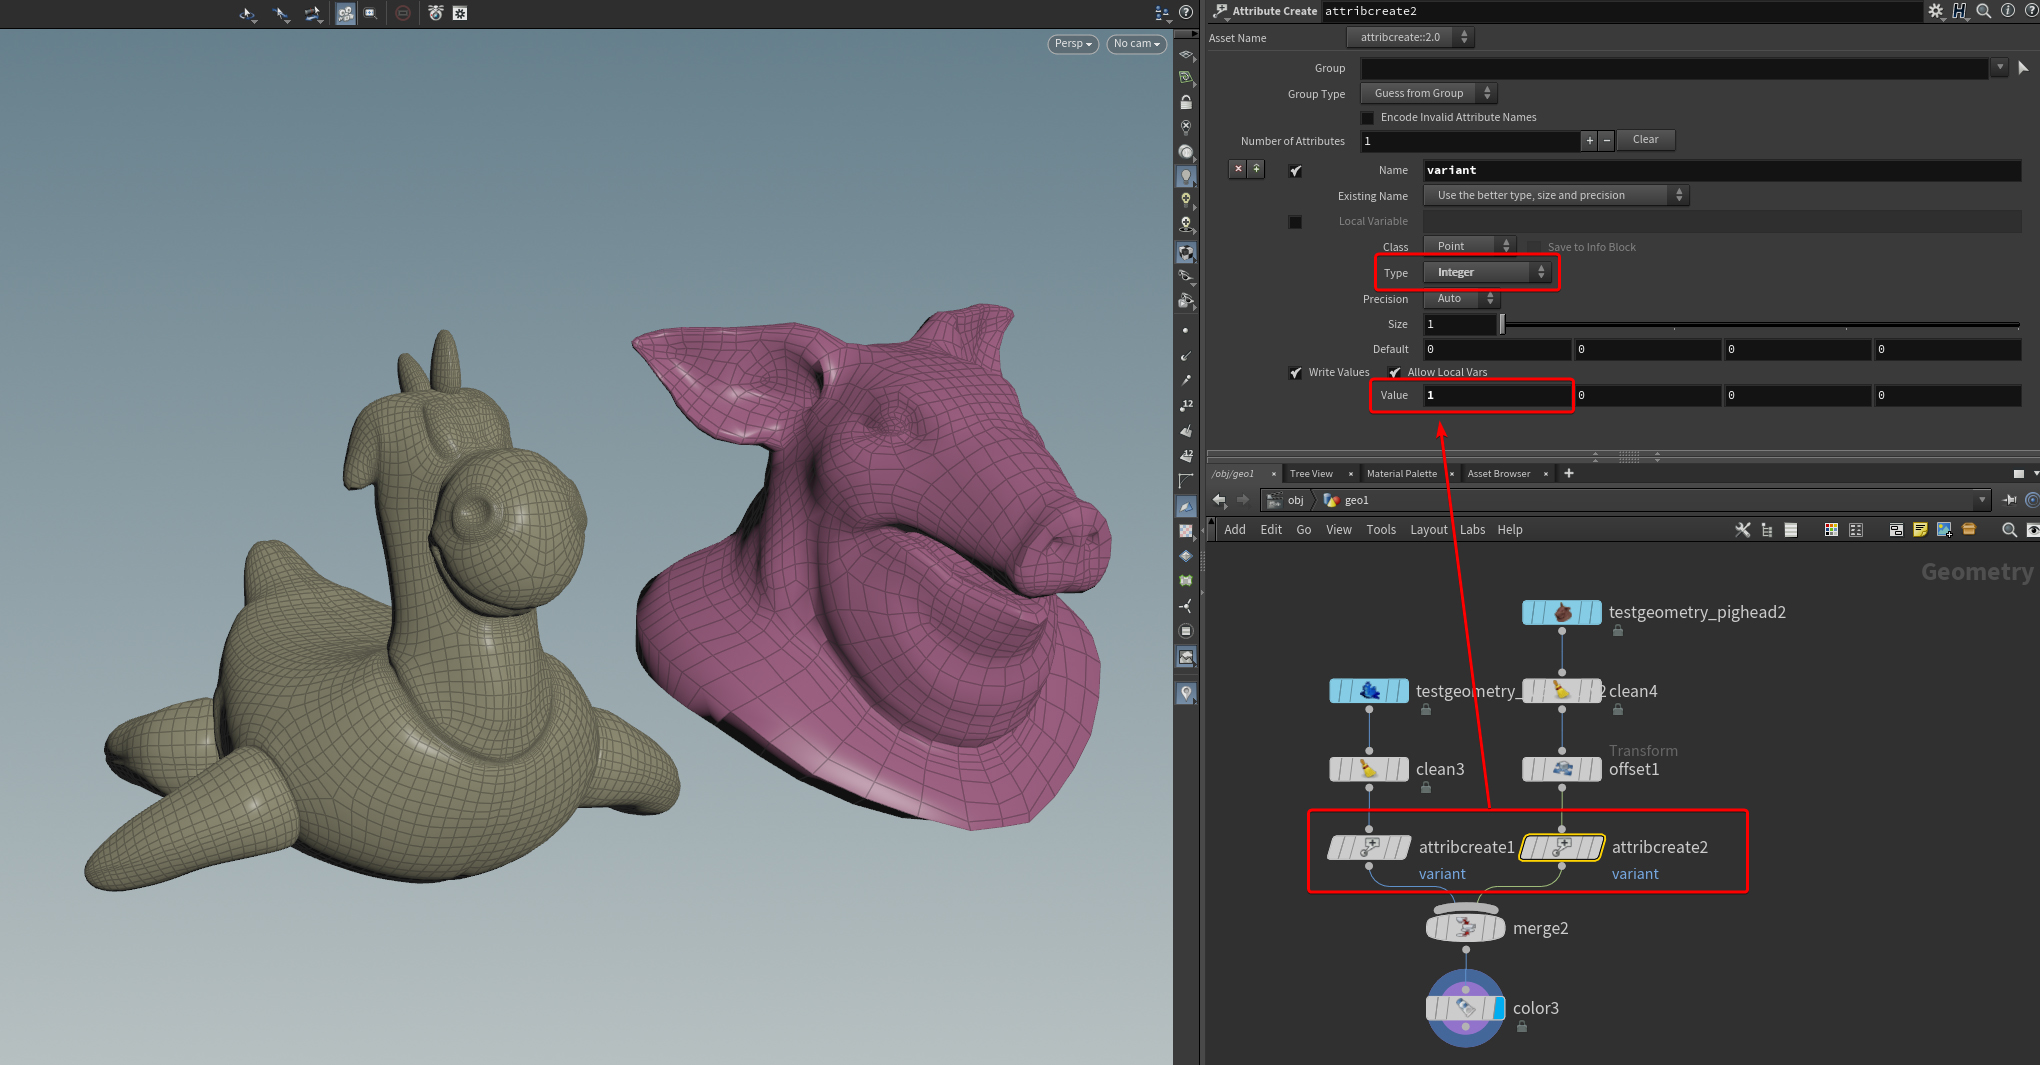
The first method is a little bit manual, you can create and set the variant attribute on each object before they get merged, but this means you have to type the various numbers one by one and edit them by hand if you add or remove objects:
The other alternative is to use the Pack node before merging, and the Unpack one after creating the variant attribute.
The only thing to remember when using Pack and Unpack nodes is that by default it doesn’t keep any of the attributes or groups your geometry has, so just remember to use the Transfer option of these nodes accordingly. You can just type an asterisk to select all the attributes the mesh has, and do the same for the groups if needed.
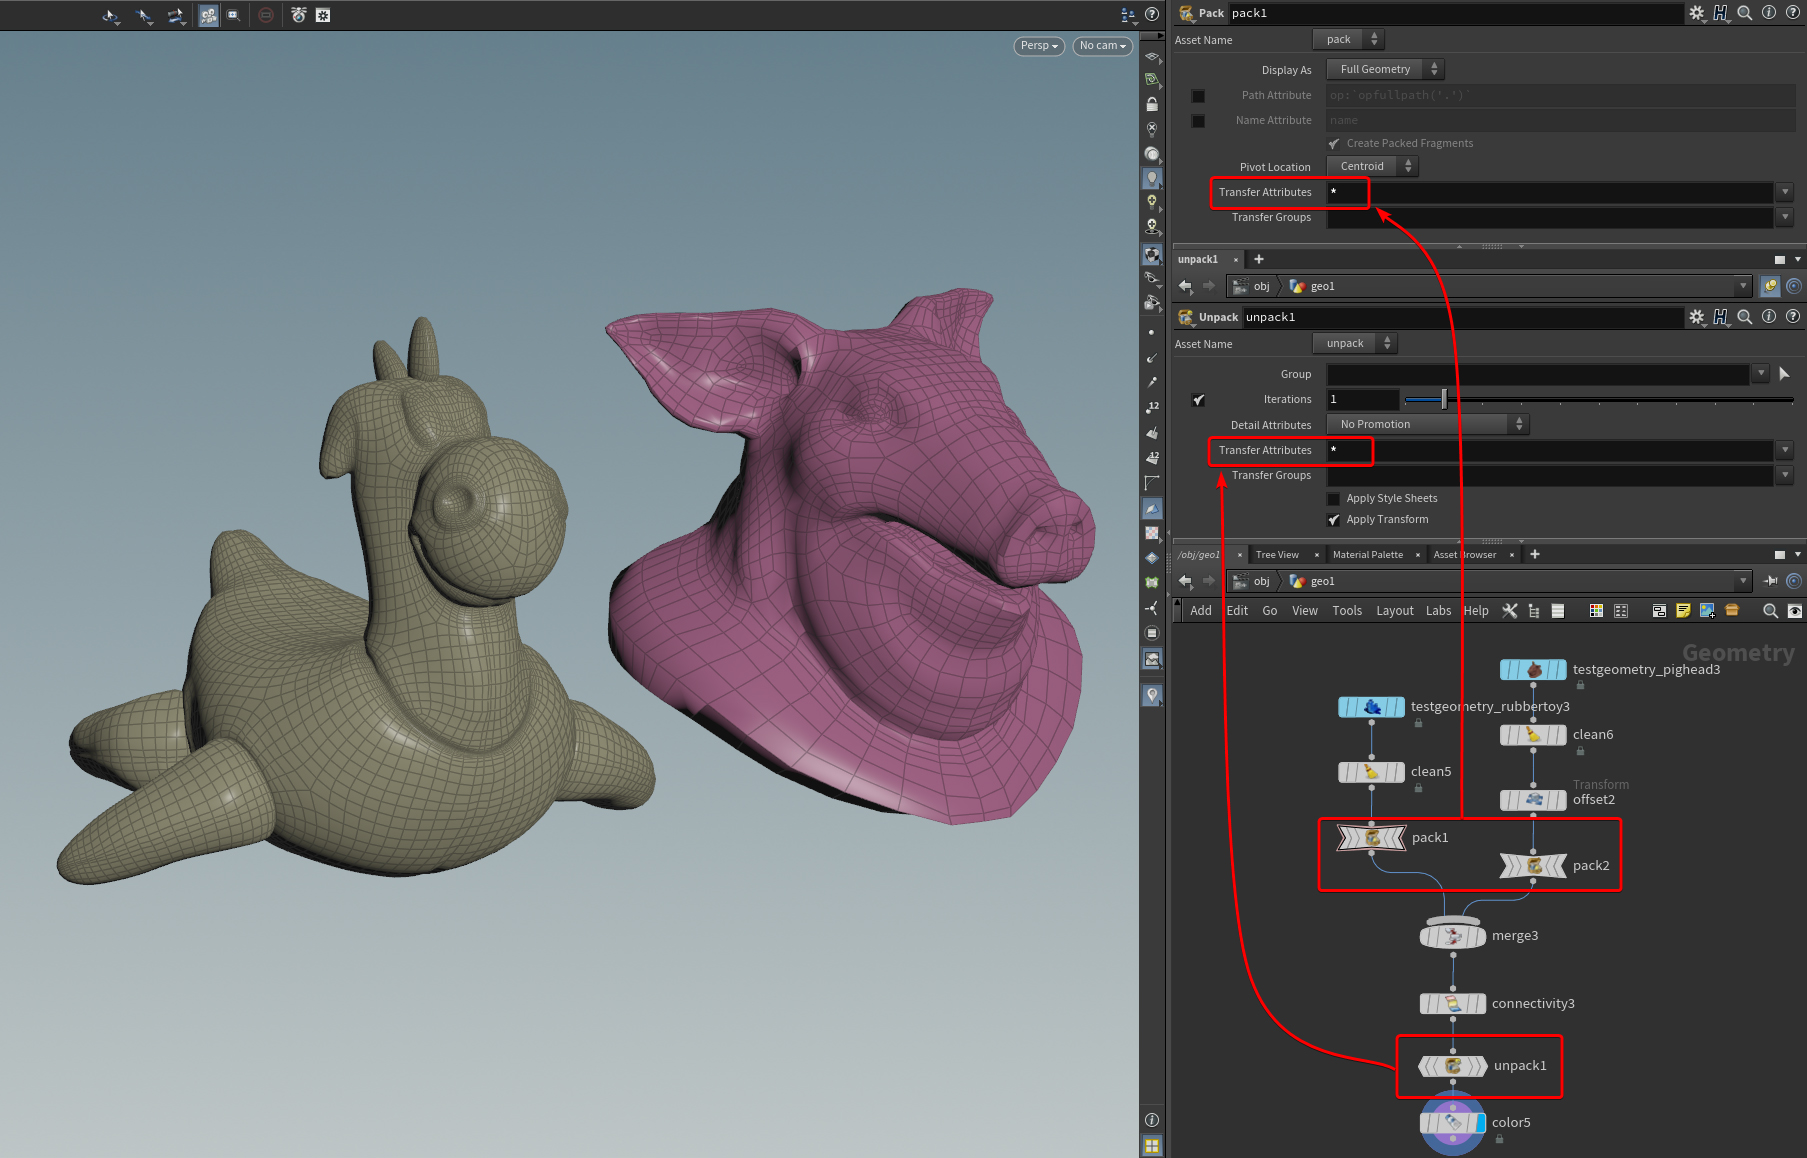
Once that’s done we need to create another parameter that tells us how many different objects we gathered together, which will be needed for the next step.
We can easily to that with the Attribute Promote node, just change the Promotion Method to Maximum, I’m also storing this information as a Detail Attribute and renaming it to “max”.

Target Points
Now we can finally start defining the points we are going to copy these objects into.
For this example, I’m just using the points of a simple grid, the only thing we need to do is to assign a unique ID for each of these points, which will correspond to the different objects in our Pool.
I’ll show you two different ways of doing it, one with VEX and the other one just using built-in nodes, however they both use a neat technique to reference our Objects Pool node, more specifically, we need to read the max Detail Attribute we made earlier.
Spare Input
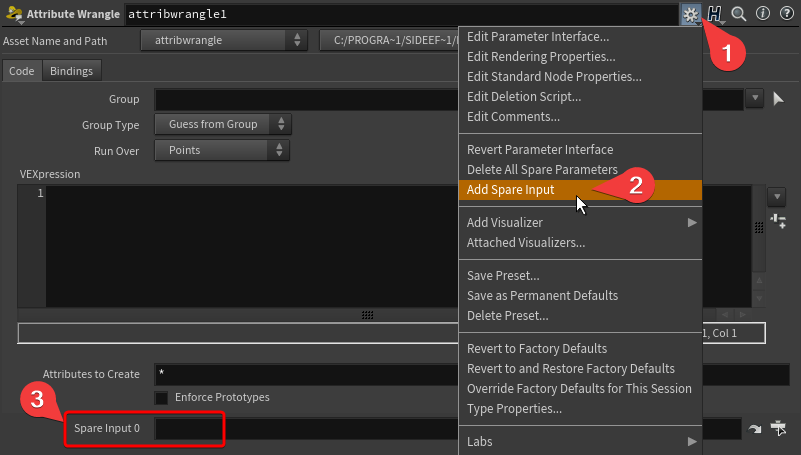
We can add a Spare Input to any node you want, just select your node and add one from the menu the cog icon opens. A “Sapre Input 0” Parameter will be added.
Now if you drag and drop the Object Pool node into the Spare Input slot a purple dotted line appears, which means we can now reference it directly.
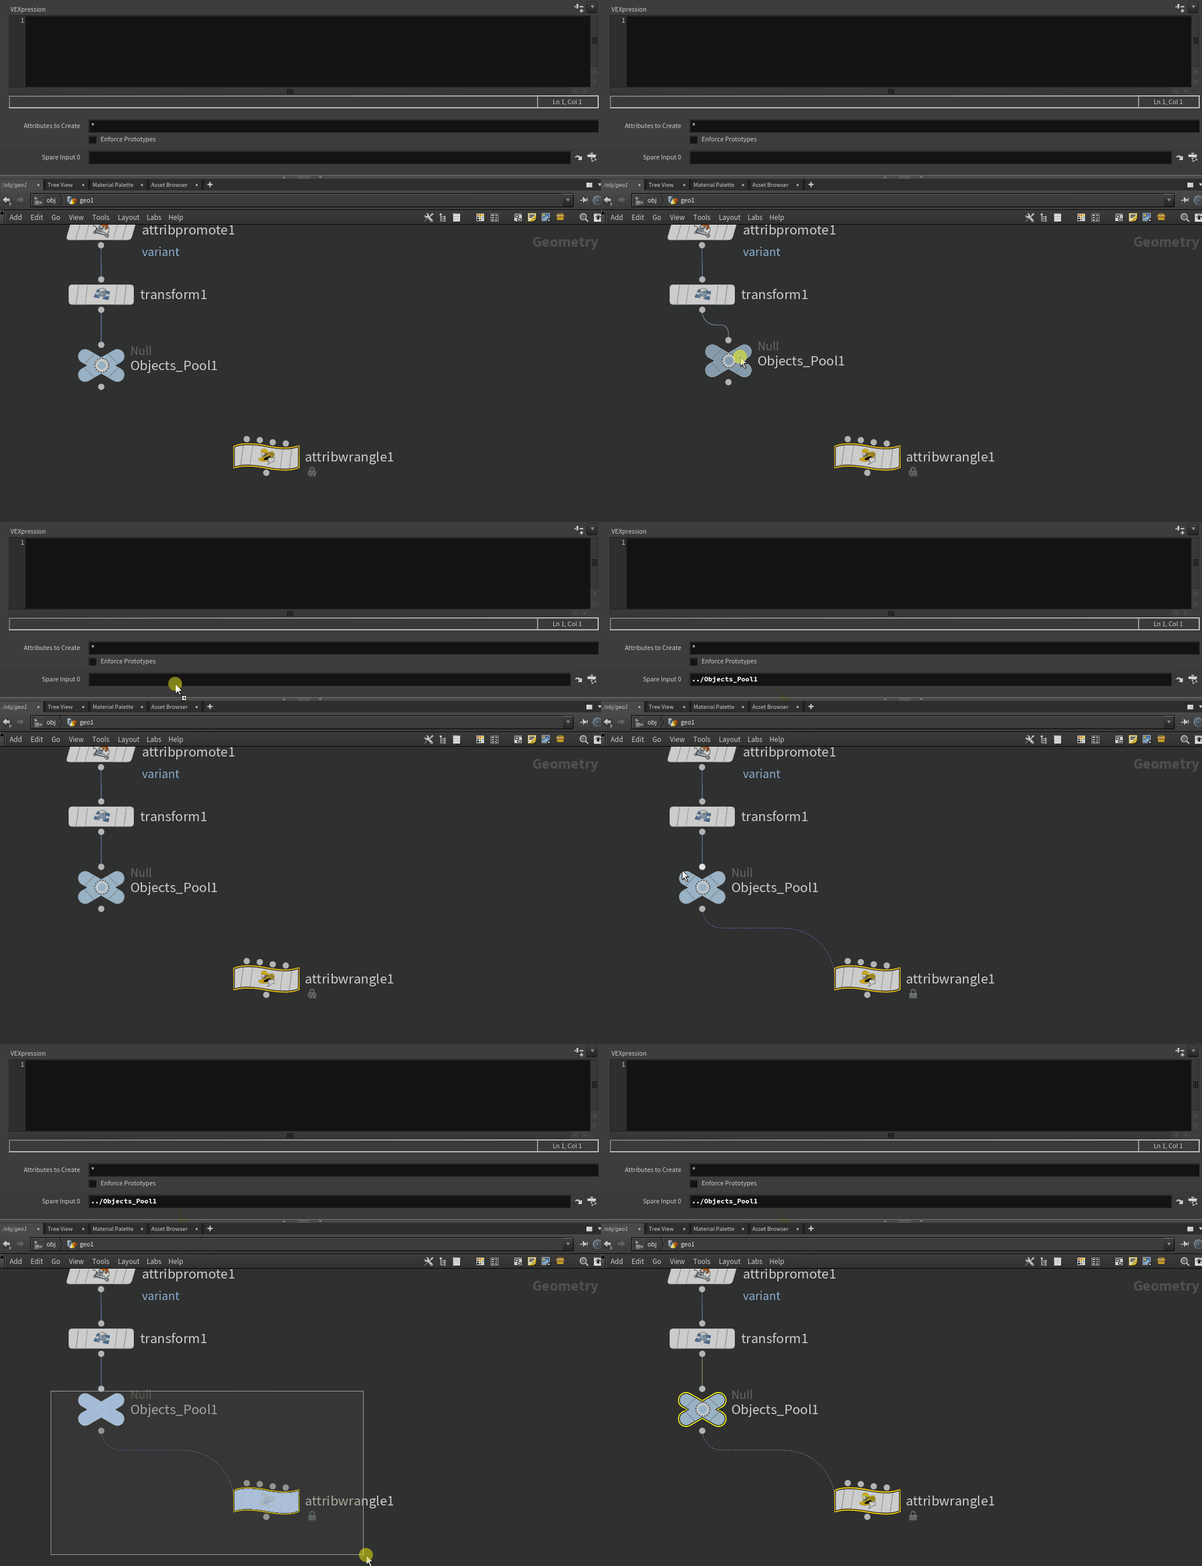
The two methods
The first method I’ll show you uses two built-in nodes
First create an Attribute Randomize, change the Attribute Name to “variant” and under the Distribution tab set it to “Uniform (Discrete)” (to get only whole numbers) and for the Max Value we want to reference max attribute from the Objects Pool, since we created that purple connection earlier we can simply write:
detail(-1, "max", 0)Because the surface node -1 it’s the Spare Input 0
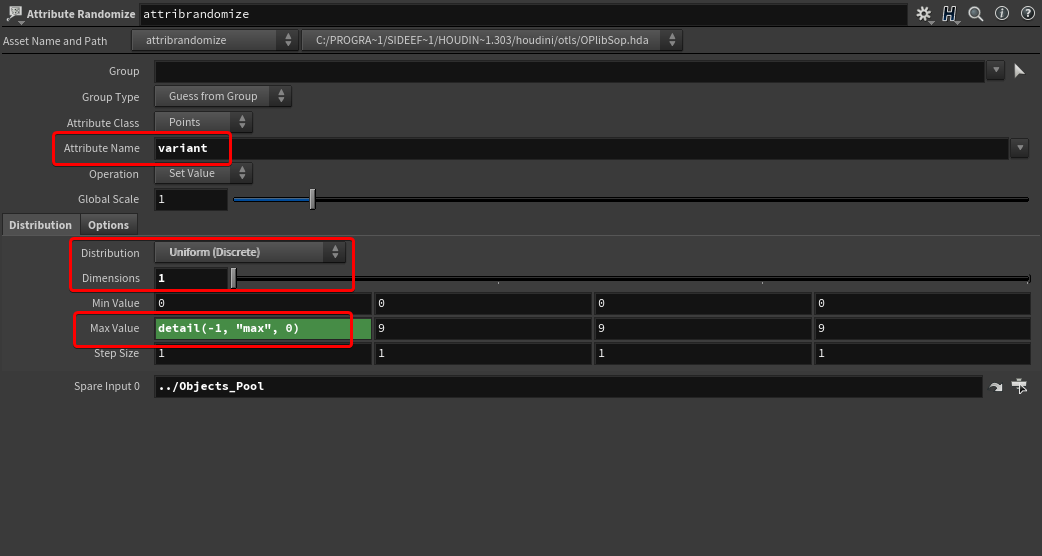
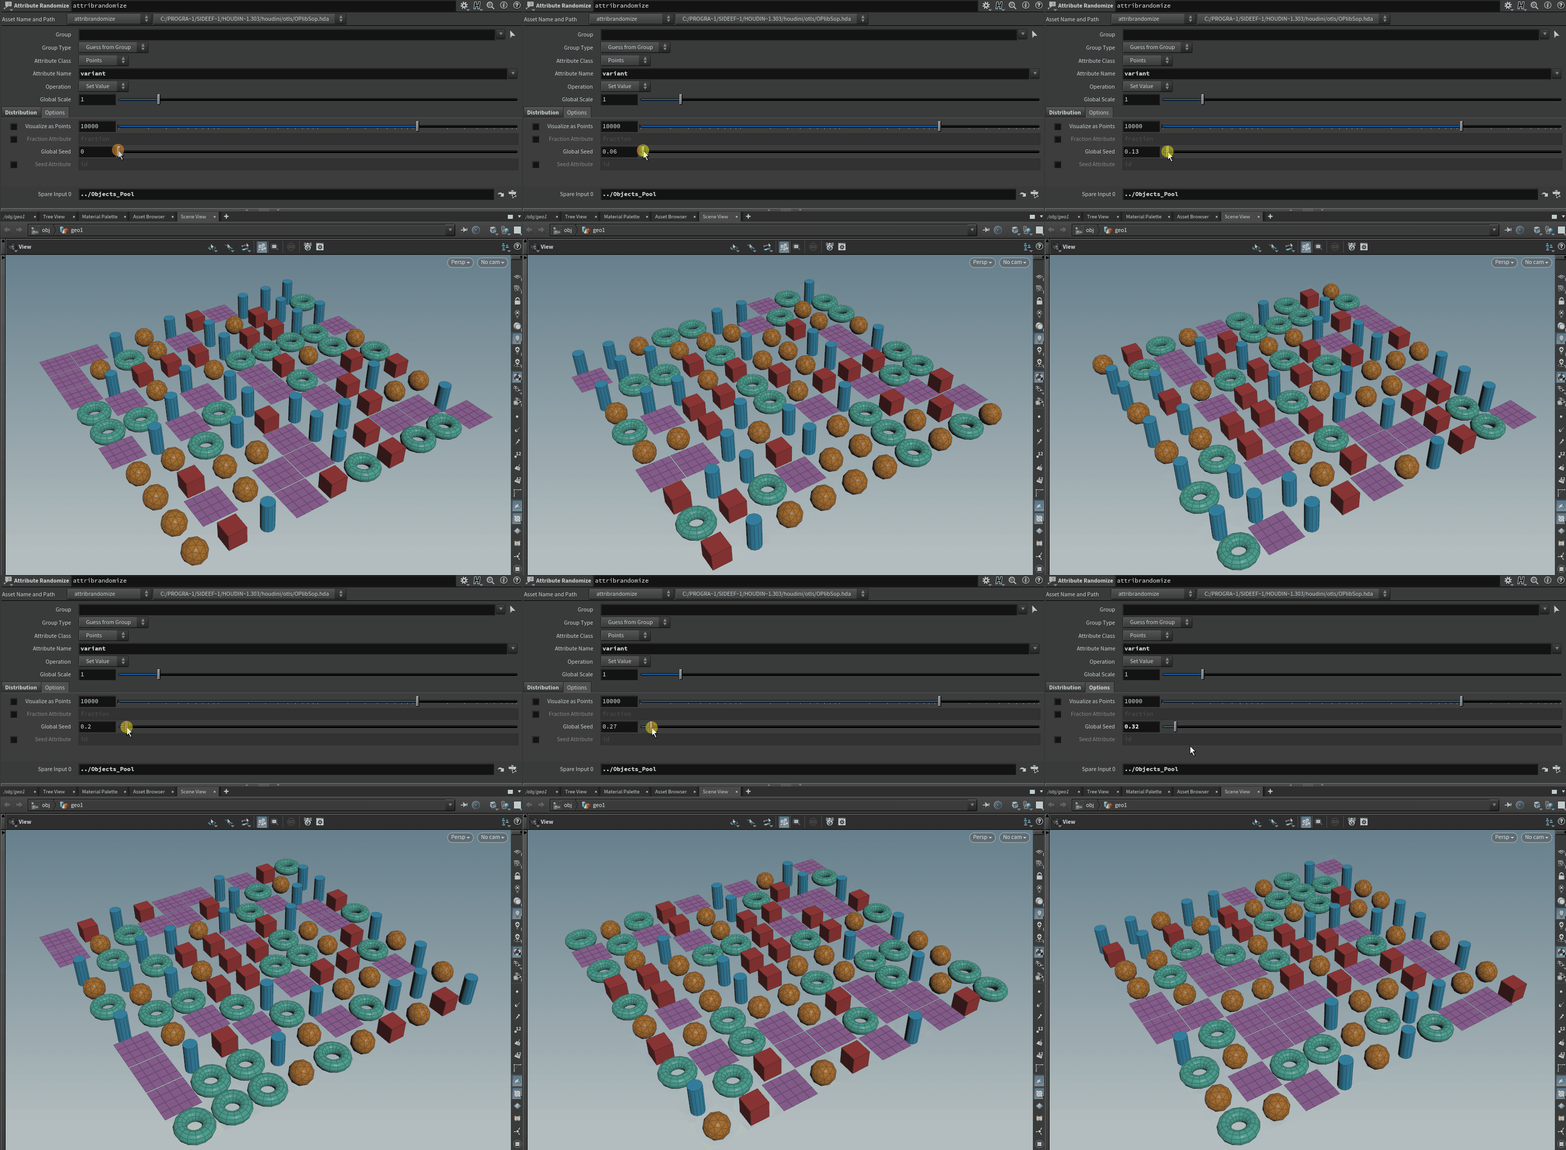
Under the Options tab you can also change the seed.
Now the only problem is that the attribute created it’s a float, but we need it to be an integer, to convert it we can use an Attribute Cast, just write the parameter’s name and change the Precision to 16-bit integer.

For the VEX alternative, we can run over the Points using an Attribute Wrangle:
i@variant = set(rint(rand(@P + chi("Seed")) * chi("Amount")));In this case, I’m driving the randomization using the point’s position and adding a float as a seed. However the rand function gives a value between 0 and 1, but we need a value between 0 and the max amount of objects we have in our Pool, to get that value we can reference it the same way as I showed before.
One last thing to note is that the rand function will give us a decimal numeral, using set() we can explicitly tell Houdini to convert the float to an integer, but that will only truncate the number, which means we’ll never get the last variant ID of the Pool. To include it, we’ll have to round the number using print().

Final Step and Last Notes
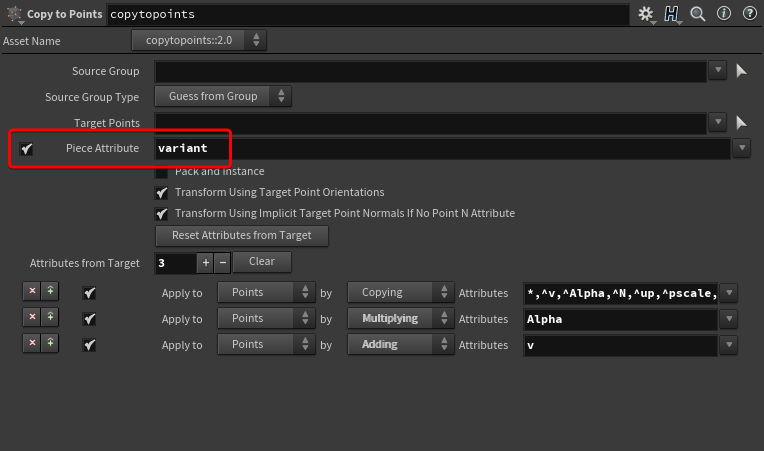
We are finally ready to put together the Pool with our Points with a Copy To Point node, we just need to turn on Piece Attribute and select our attribute variant.
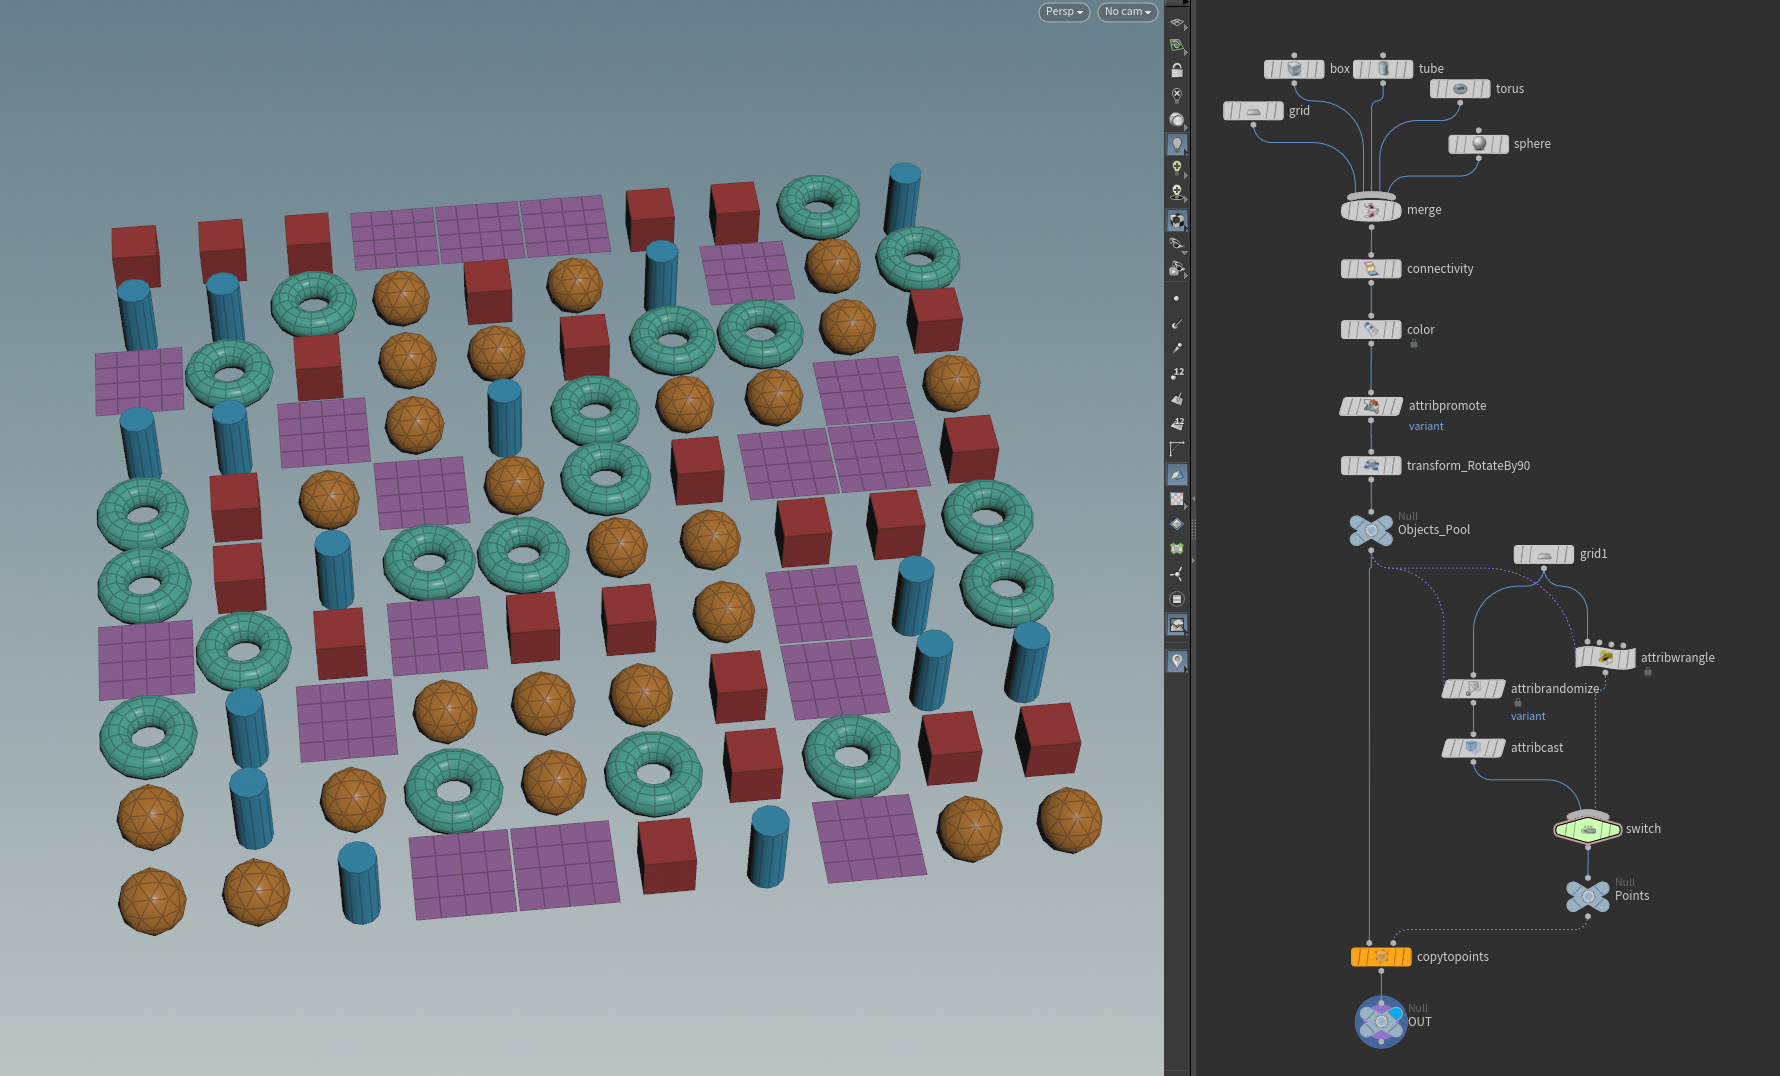
Here’s the result with our beautiful graph:
Randomize the result with the seed parameters mentioned earlier
I hope you found this useful, have a great rest of the day!!

Leave a Reply