(Construction Script, User-Friendly Parameters, Replace Materials)
Intro
This exploration started because I wanted to create some dynamic, but still editable, exposed variables for a spawnable blueprint. I encountered some interesting stuff that I wanted to share.
In my previous blog post, I explained the limitation of not being able to edit the details parameters of a component inside a spawnable blueprint, the changes don’t get saved because the actor is spawned “from scratch” every time. A workaround would be having the actor live in the level, but in some cases, you might not be able to set it as Possessable and it needs to be Spawnable.
The video below showcases the problem of editing the components’ details of a spawnable blueprint:
In this case, the components’ details can be set through the construction script, this is the only “edge case” application where I think the exploration I’ve done is actually useful, you can find more about the conclusion at the end of the post.
A good example of something like this would be a blueprint that is shared between different characters.
I wanted the parameters as user-friendly as possible, adding features like:
- set the array’s length based on the Skeletal Mesh in use
- populate the empty slots with the Skeletal Mesh’s default materials
- store the materials the user inputs
- set custom presets to use as defaults
Below I’ll try to explain the various issues and challenges I came across, as well as the solutions I came up with.
Here’s a demonstration of the final result:
Post Scriptum Discovery
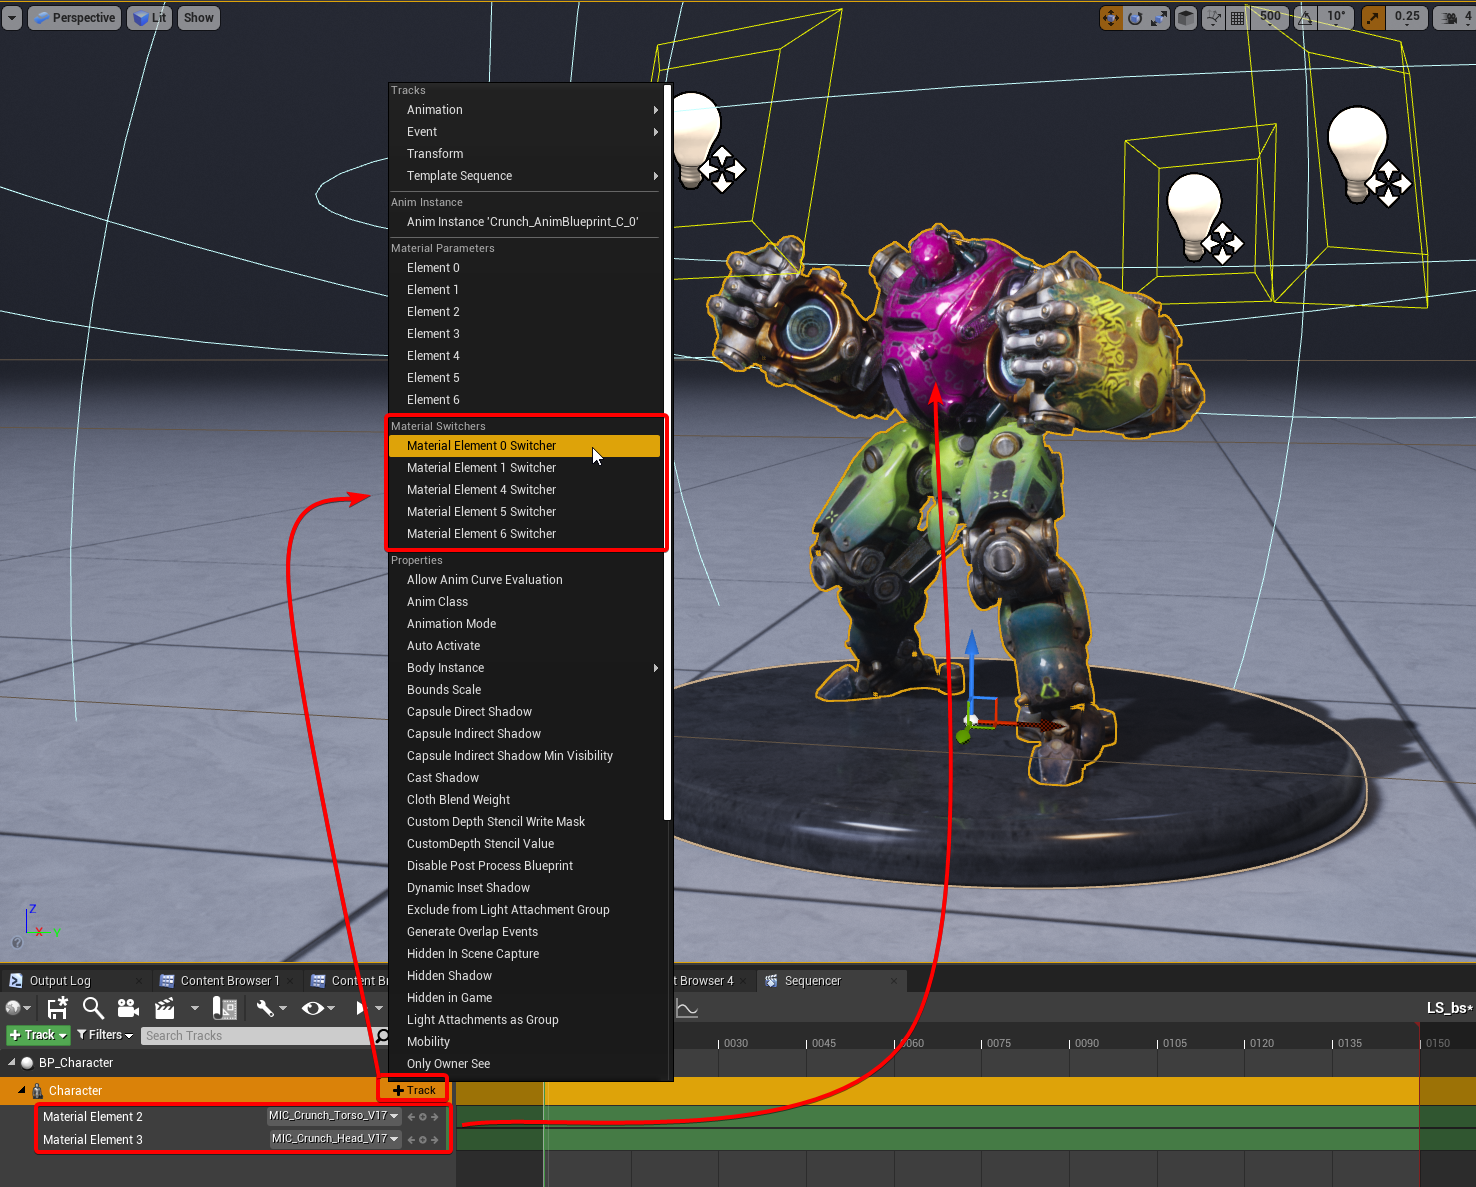
When I finished working on this entire exploration I actually found out that in Sequencer you can easily add the Skeletal Mesh component of your blueprint and override their material just using the material “Material Element” options.
Which sadly makes this exploration a bit pointless :))))
Dynamic but editable array
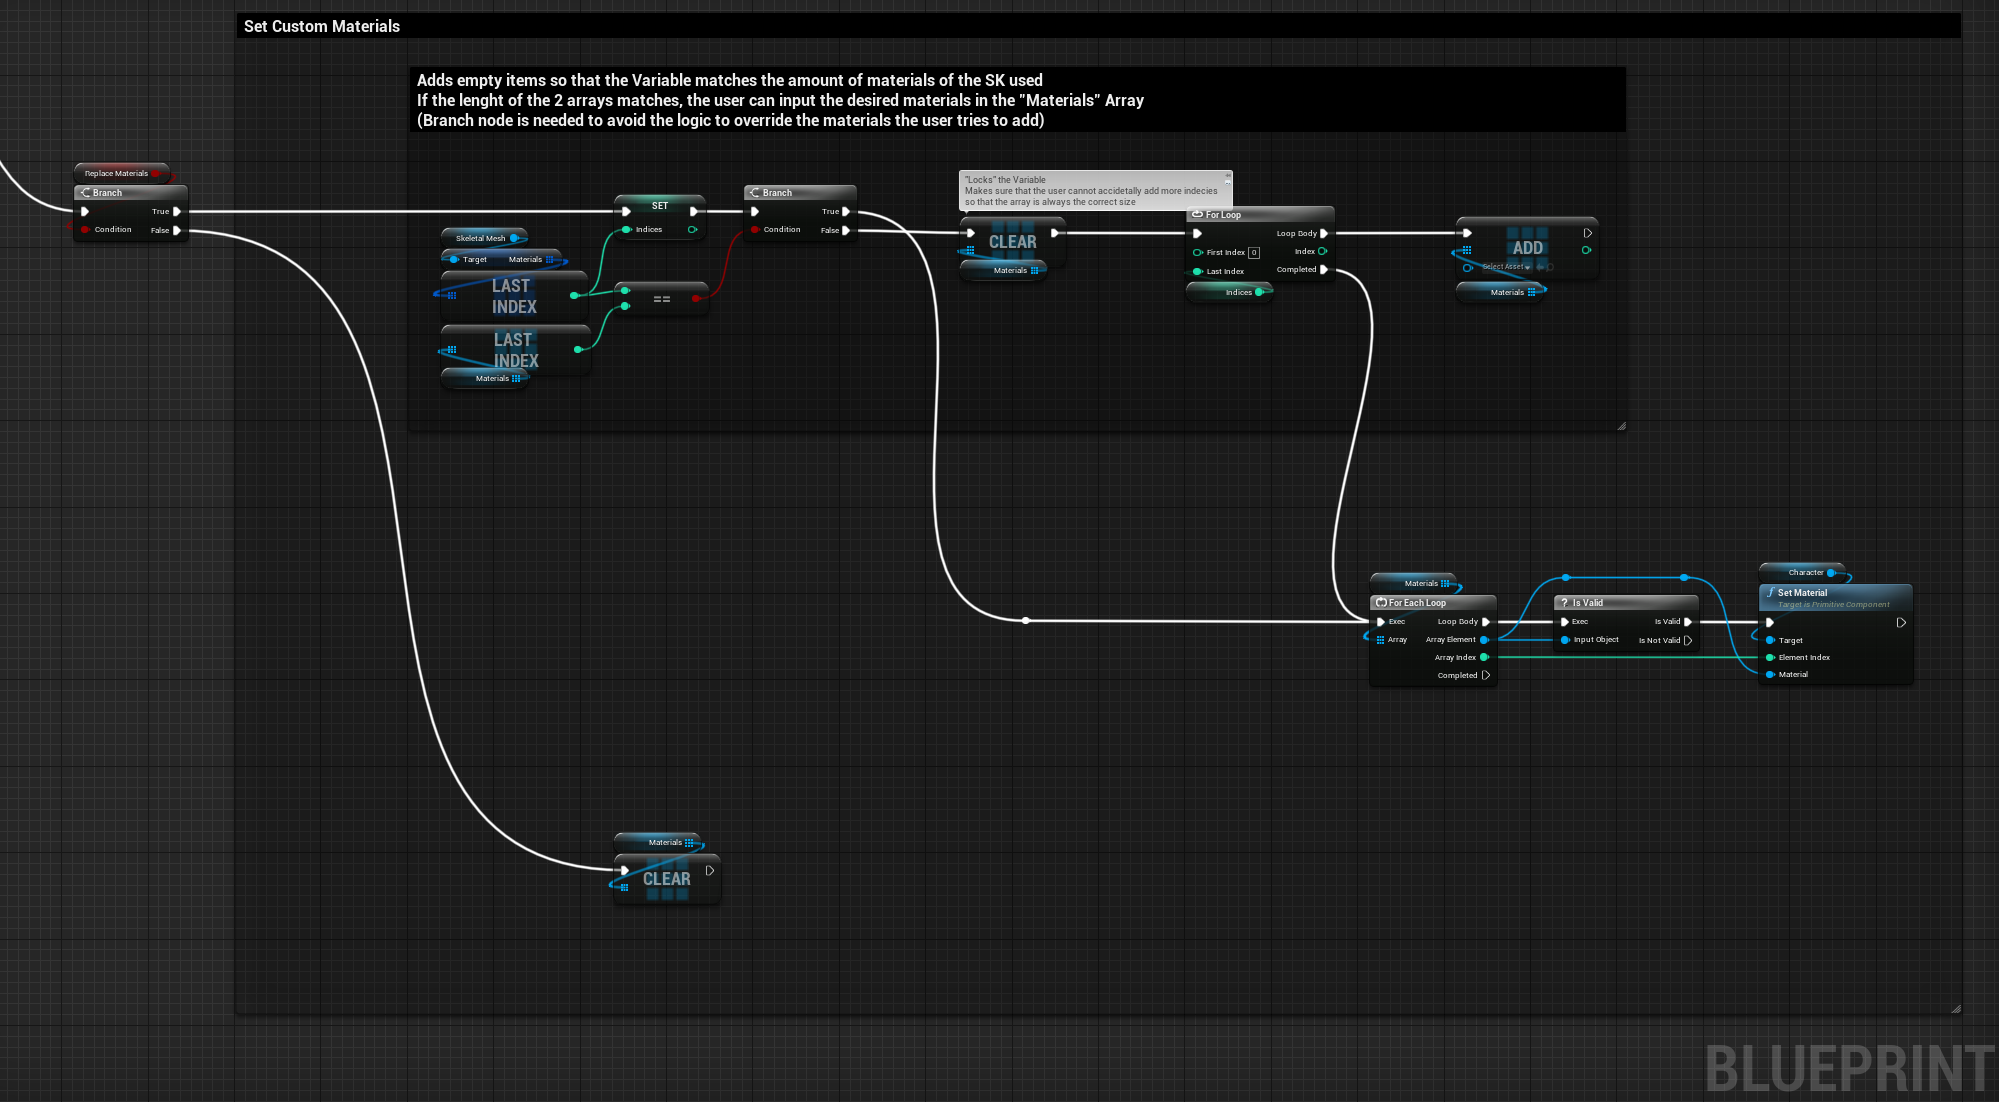
This is the main logic, a boolean “Replace Materials” updates a Material Interface array called “Materials”, which is set to editable.
When set to true the array’s length is compared to the number of materials the Skeletal Mesh has, if they don’t match “Materials” array gets cleared and then populated empty items based on how many material slots are needed.
The branch node has also another function, when the length of the two arrays matches it stops that part of the logic to run, this way the “Materials” array doesn’t get constantly reset and the user can feed the custom materials from the Details panel. I found that this setup isn’t the best when I started adding the presets feature, but I’m unaware of a better way of doing this.
After that, a “For Each Loop” sets the materials on the Skeletal Mesh Component. A “is Valid” node is used to check if the Array Element is empty, this way we can check the logic updates only the materials slot that the user defines.
Populate empty slots with SK default materials
Adding this feature was pretty easy, the default materials can be set when the “Materials” array is initiated, getting them directly from the original Skeletal Mesh asset.
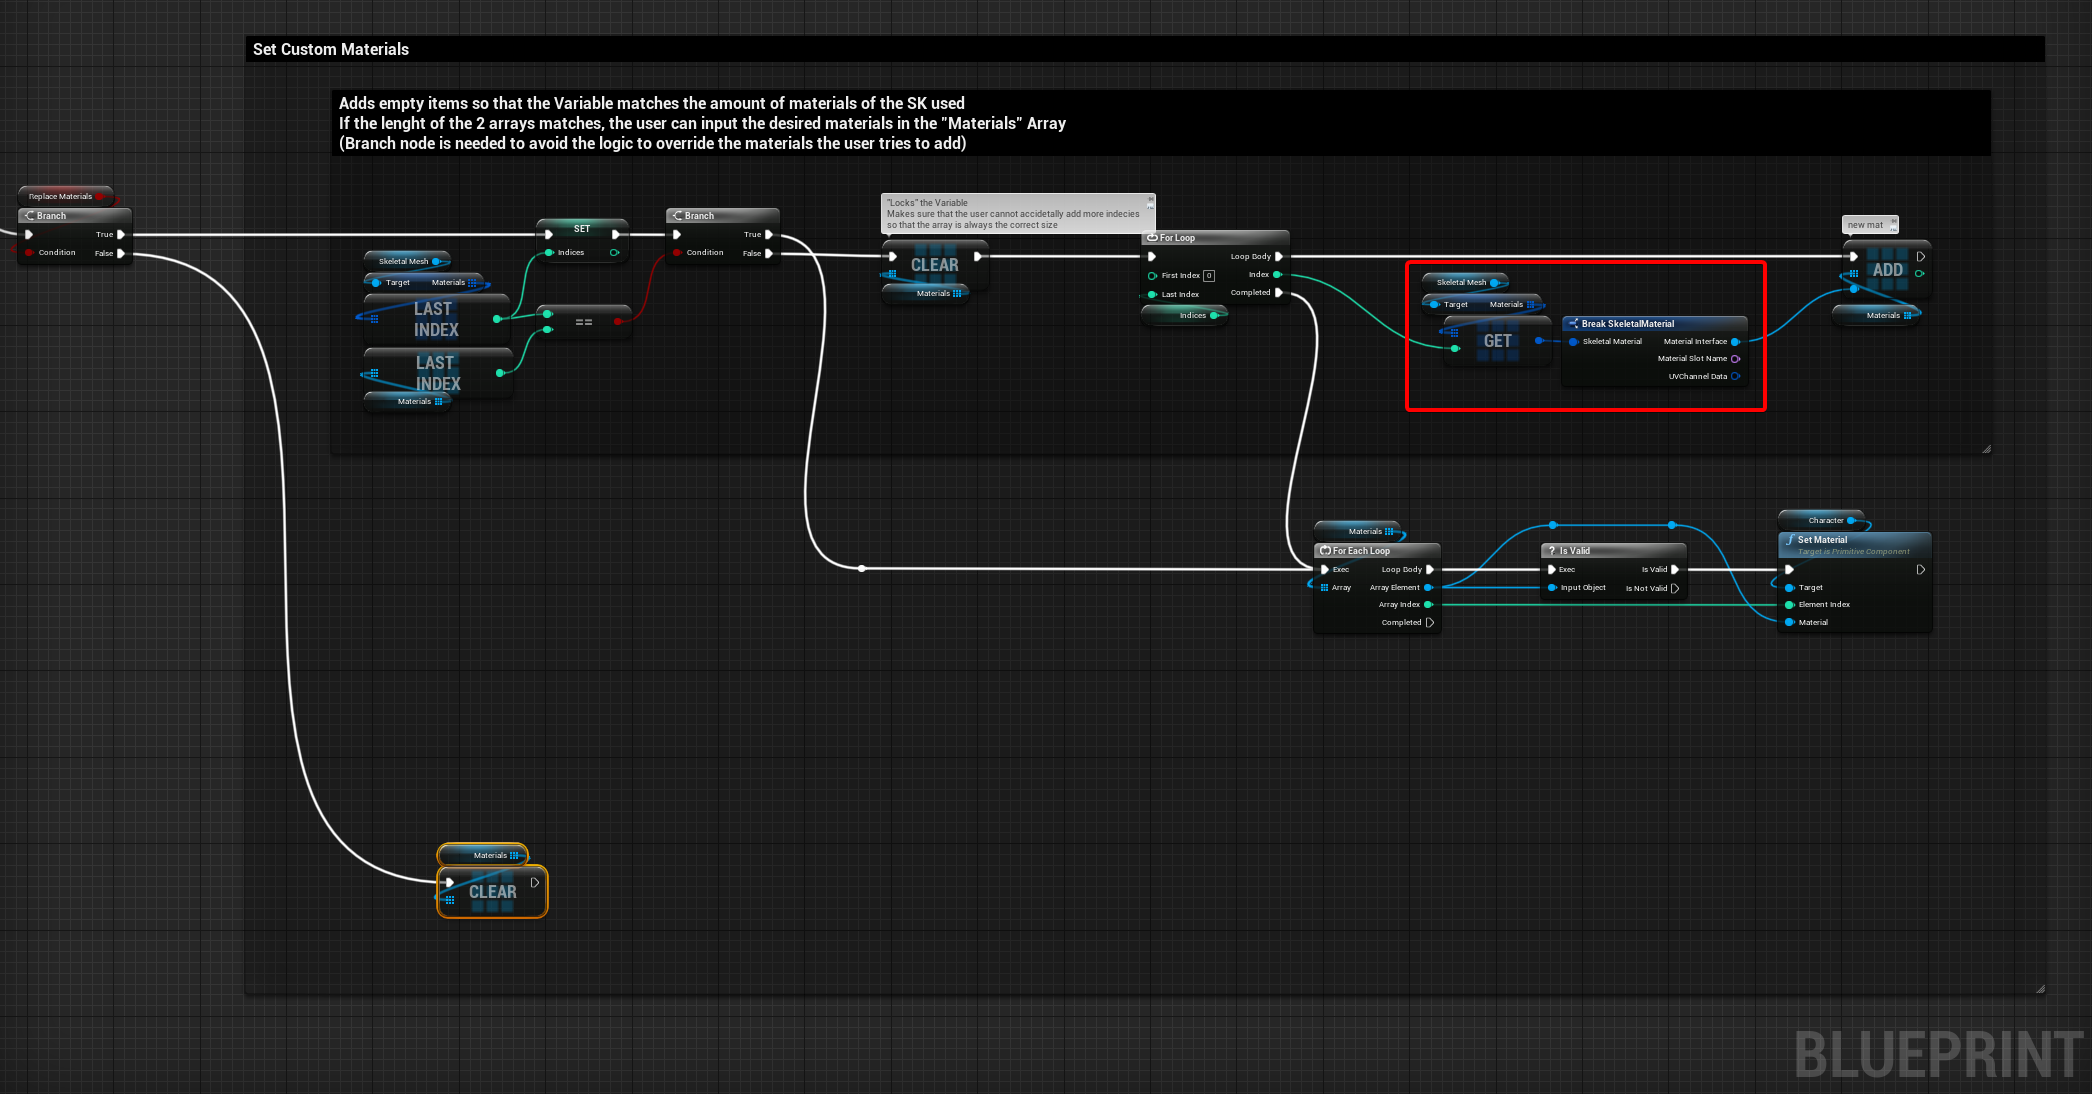
It gets a little bit more complicated once the next feature (store user’s materials) gets added.
I found this functionality useful because this way the user can easily understand which material goes in which slot.
Unfortunately, I couldn’t find a way to keep this feature once I introduced custom presets.
Store user’s materials
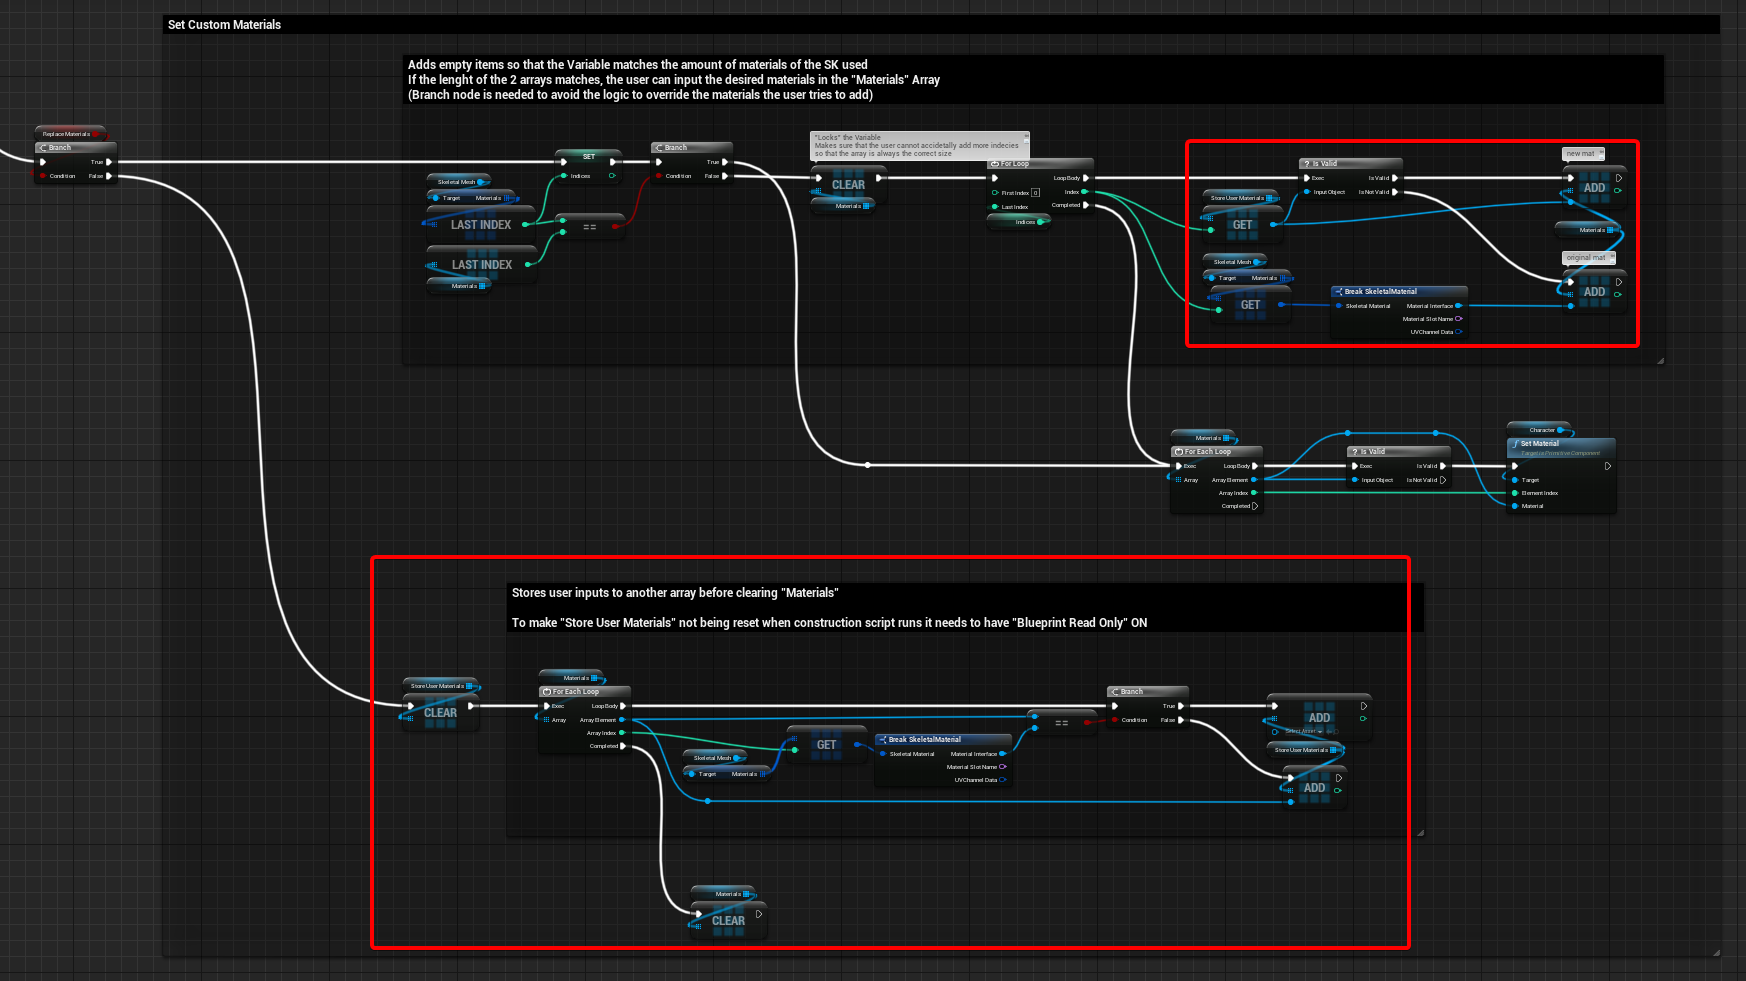
For this feature, I had to create a new Material Interface array where I could store the user’s materials.
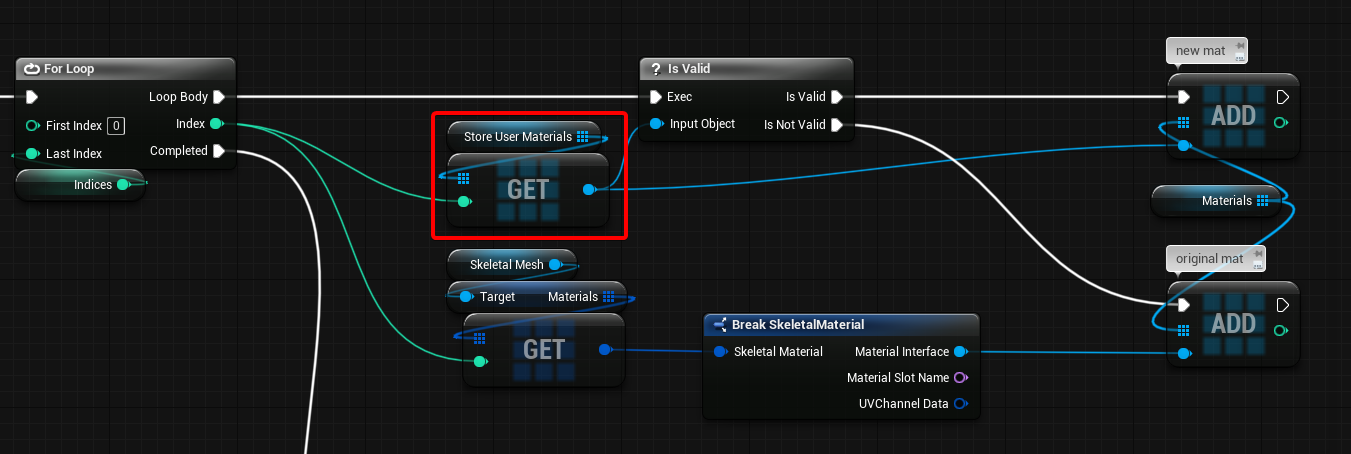
In the image above you can see what changes I did to the graph. Extra logic was added at the initialization phase, while creating and adding the various slots it checks if “Store User Materials” array contains anything, if it does it gets added and set to the SK. Here’s a closeup:
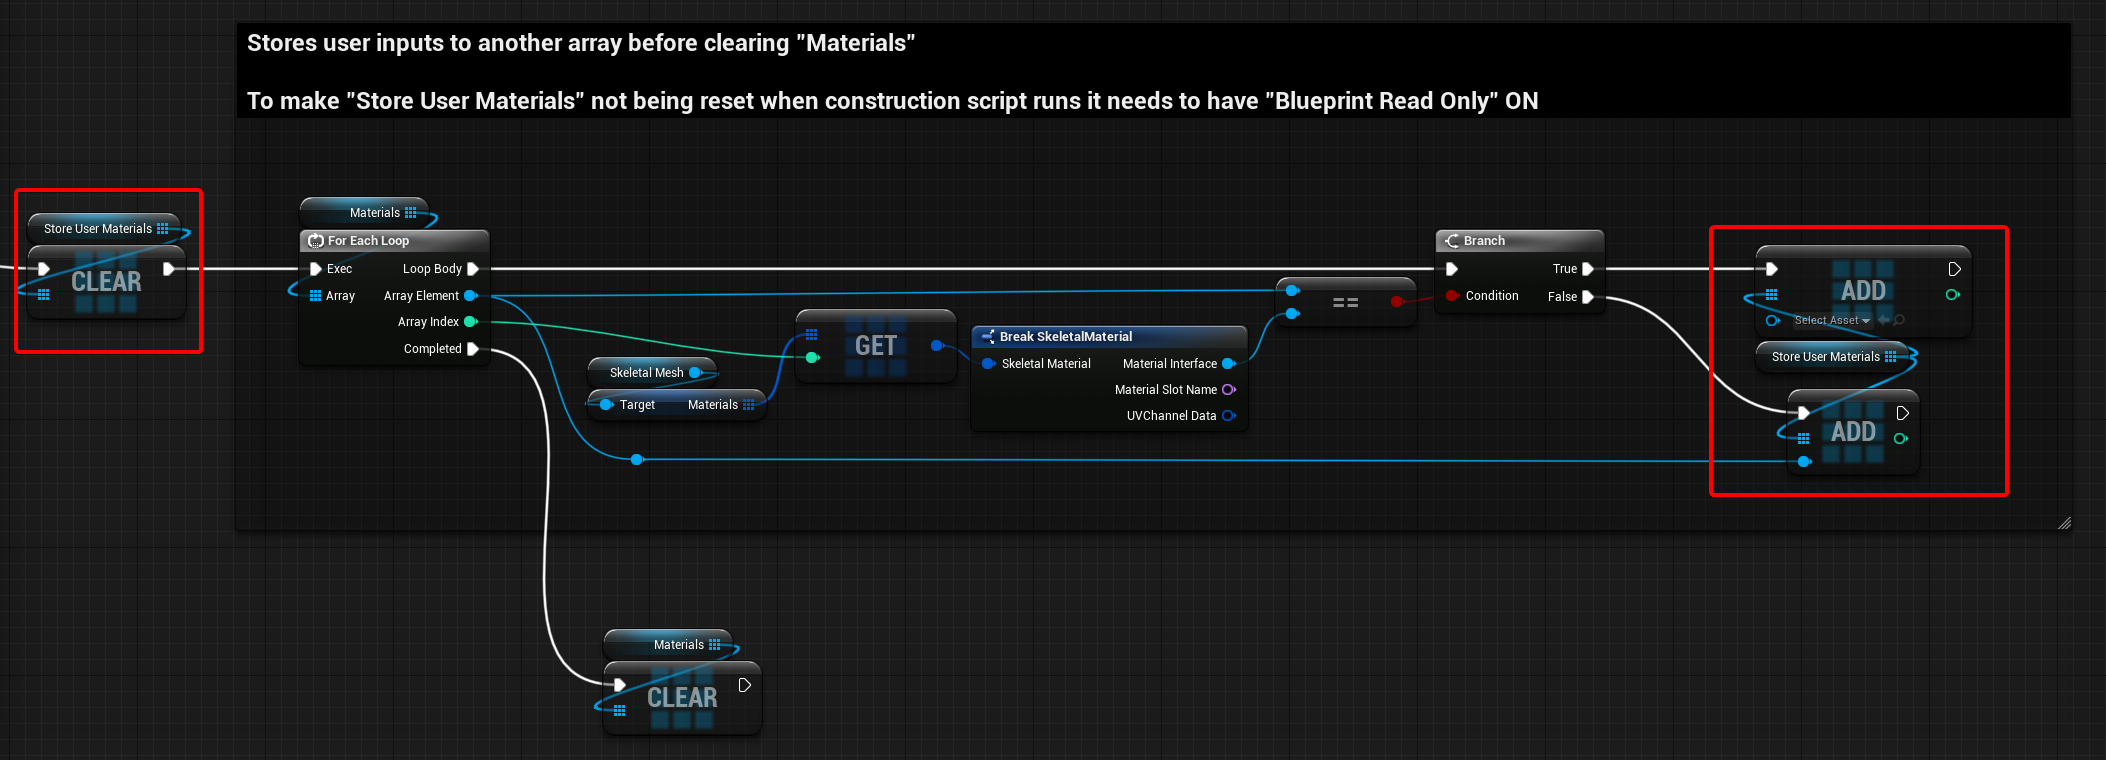
The materials the user inputs get stored once the boolean “Replace Materials” is turned to false, here’s a closeup of the logic:
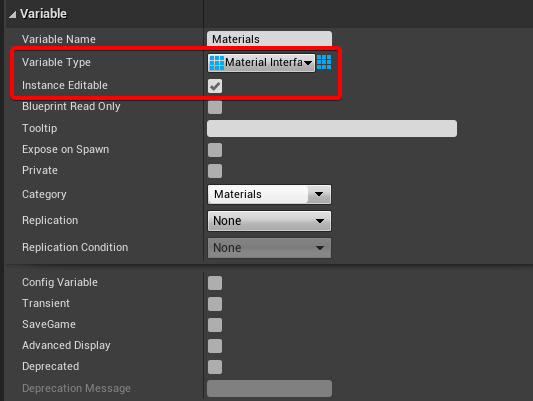
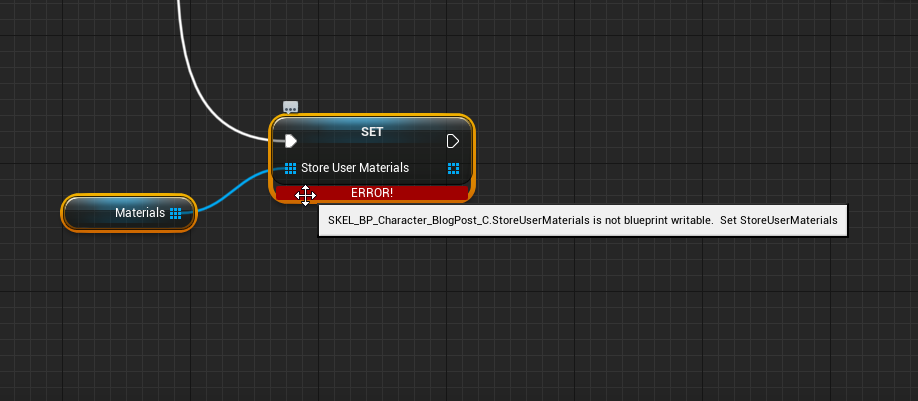
To make the variable array “Store User Materials” work, I had to turn on “Blueprint Read Only”.
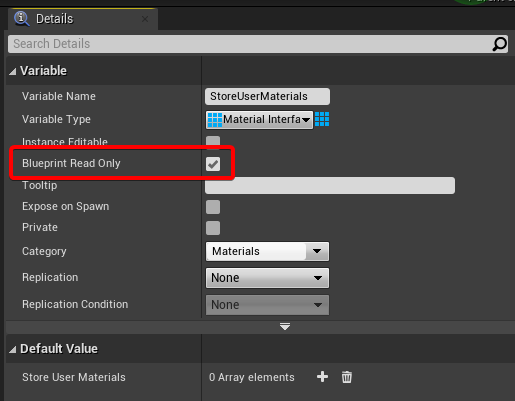
This way we are a little bit exploiting how arrays work in Unreal:
to store the user’s materials we need to stop the blueprint to reset the array every time the construction script runs, which is possible by setting “Blueprint Read Only” to true.
However, this is when I realized that this way you can’t set directly the variable with a “Set” node, but even if the variable is “Read Only” we can still clear it and add items, even if theoretically you shouldn’t be allowed to.
Moreover, this made me notice that the same applies if “Instance Editable” is turned on.
Therefore this whole exploration was made possible by this exploit.
I believe this has something to do about mutable and immutable variables and how arrays are implemented in Unreal Engine.
Set custom presets as default
I initially tried to have the presets as structs, but it wasn’t the right choice since I would have needed separate Structs for each preset and tI couldn’t find an easy way to dynamically swap between them the blueprint’s logic.
Data tables, in this case, are a better solution since they are more flexible, they can’t be set at runtime so they require some initial setup.
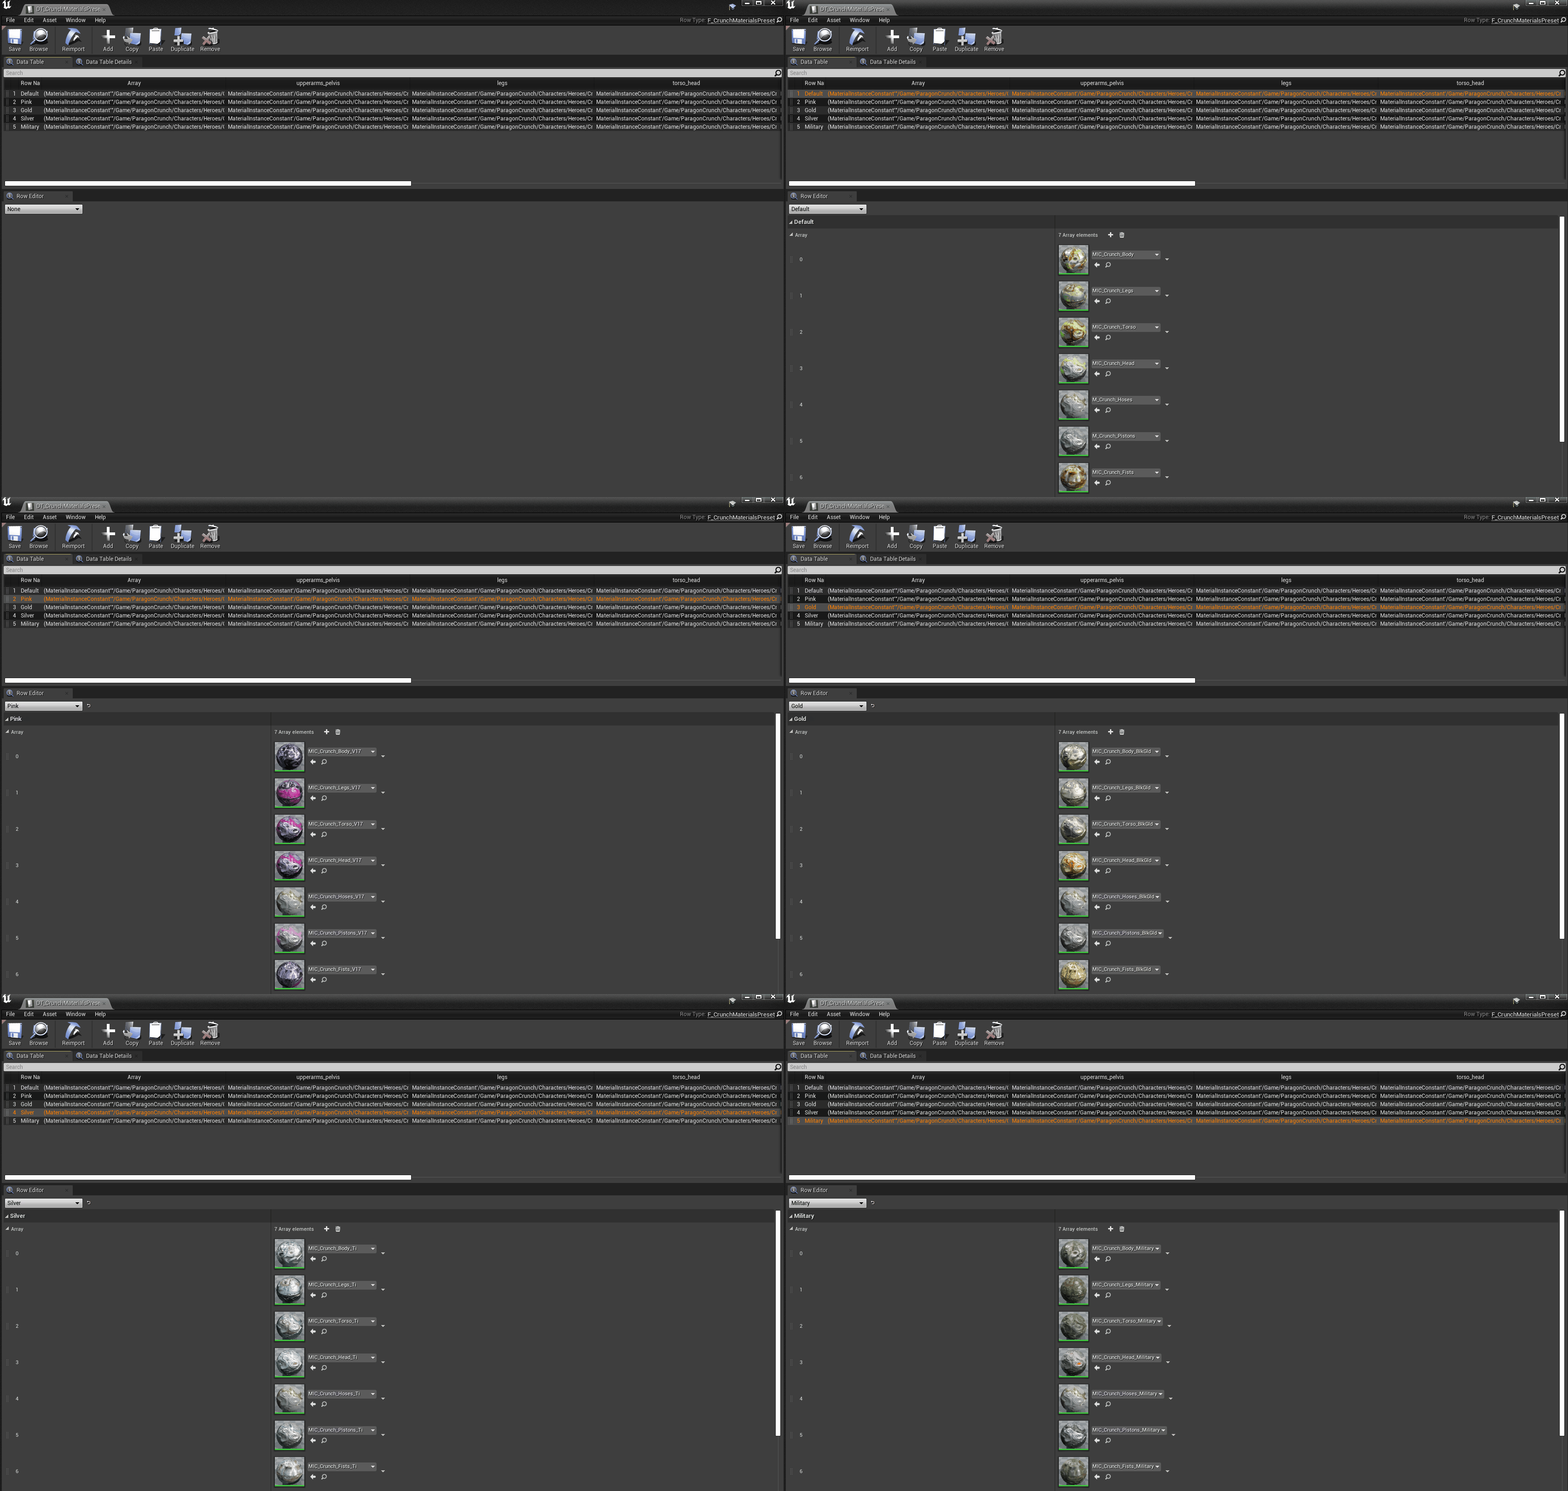
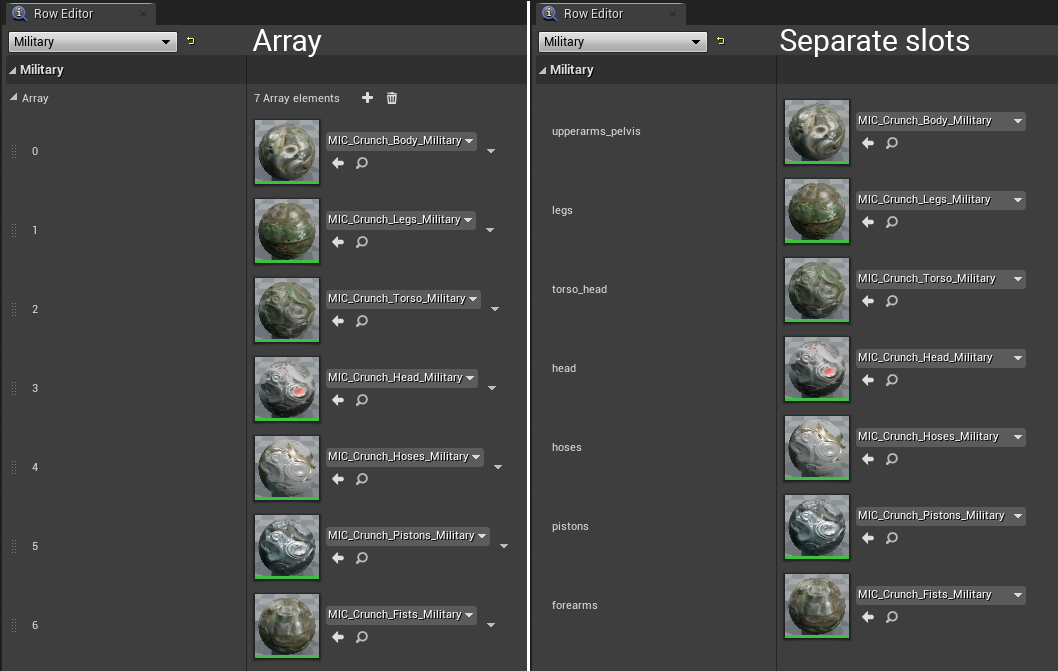
Data Tables are generated from a Struct asset, to make it work with different characters the Struct needs to contain an Array variable since the number of slot materials is not defined. However, the setup needs to be only for one specific character I would use a Material Variable for each slot so that a name can be added to match the slot name used on the Skeletal Mesh.
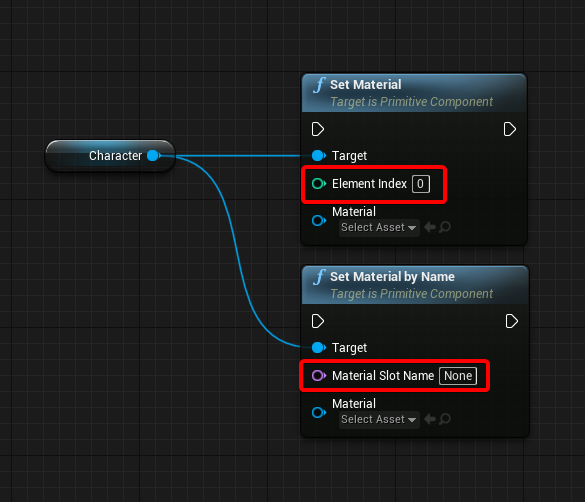
If you want to add the names of the slots, you could probably have another array of Name variables, so that you can store that information as well. This way you could actually re-arrange the order of the slots and set the materials on the Skeletal Mesh using the “Set Material by Name”, this way you don’t have to rely on the array order.
Here’s the final graph: (Click to open in full size)
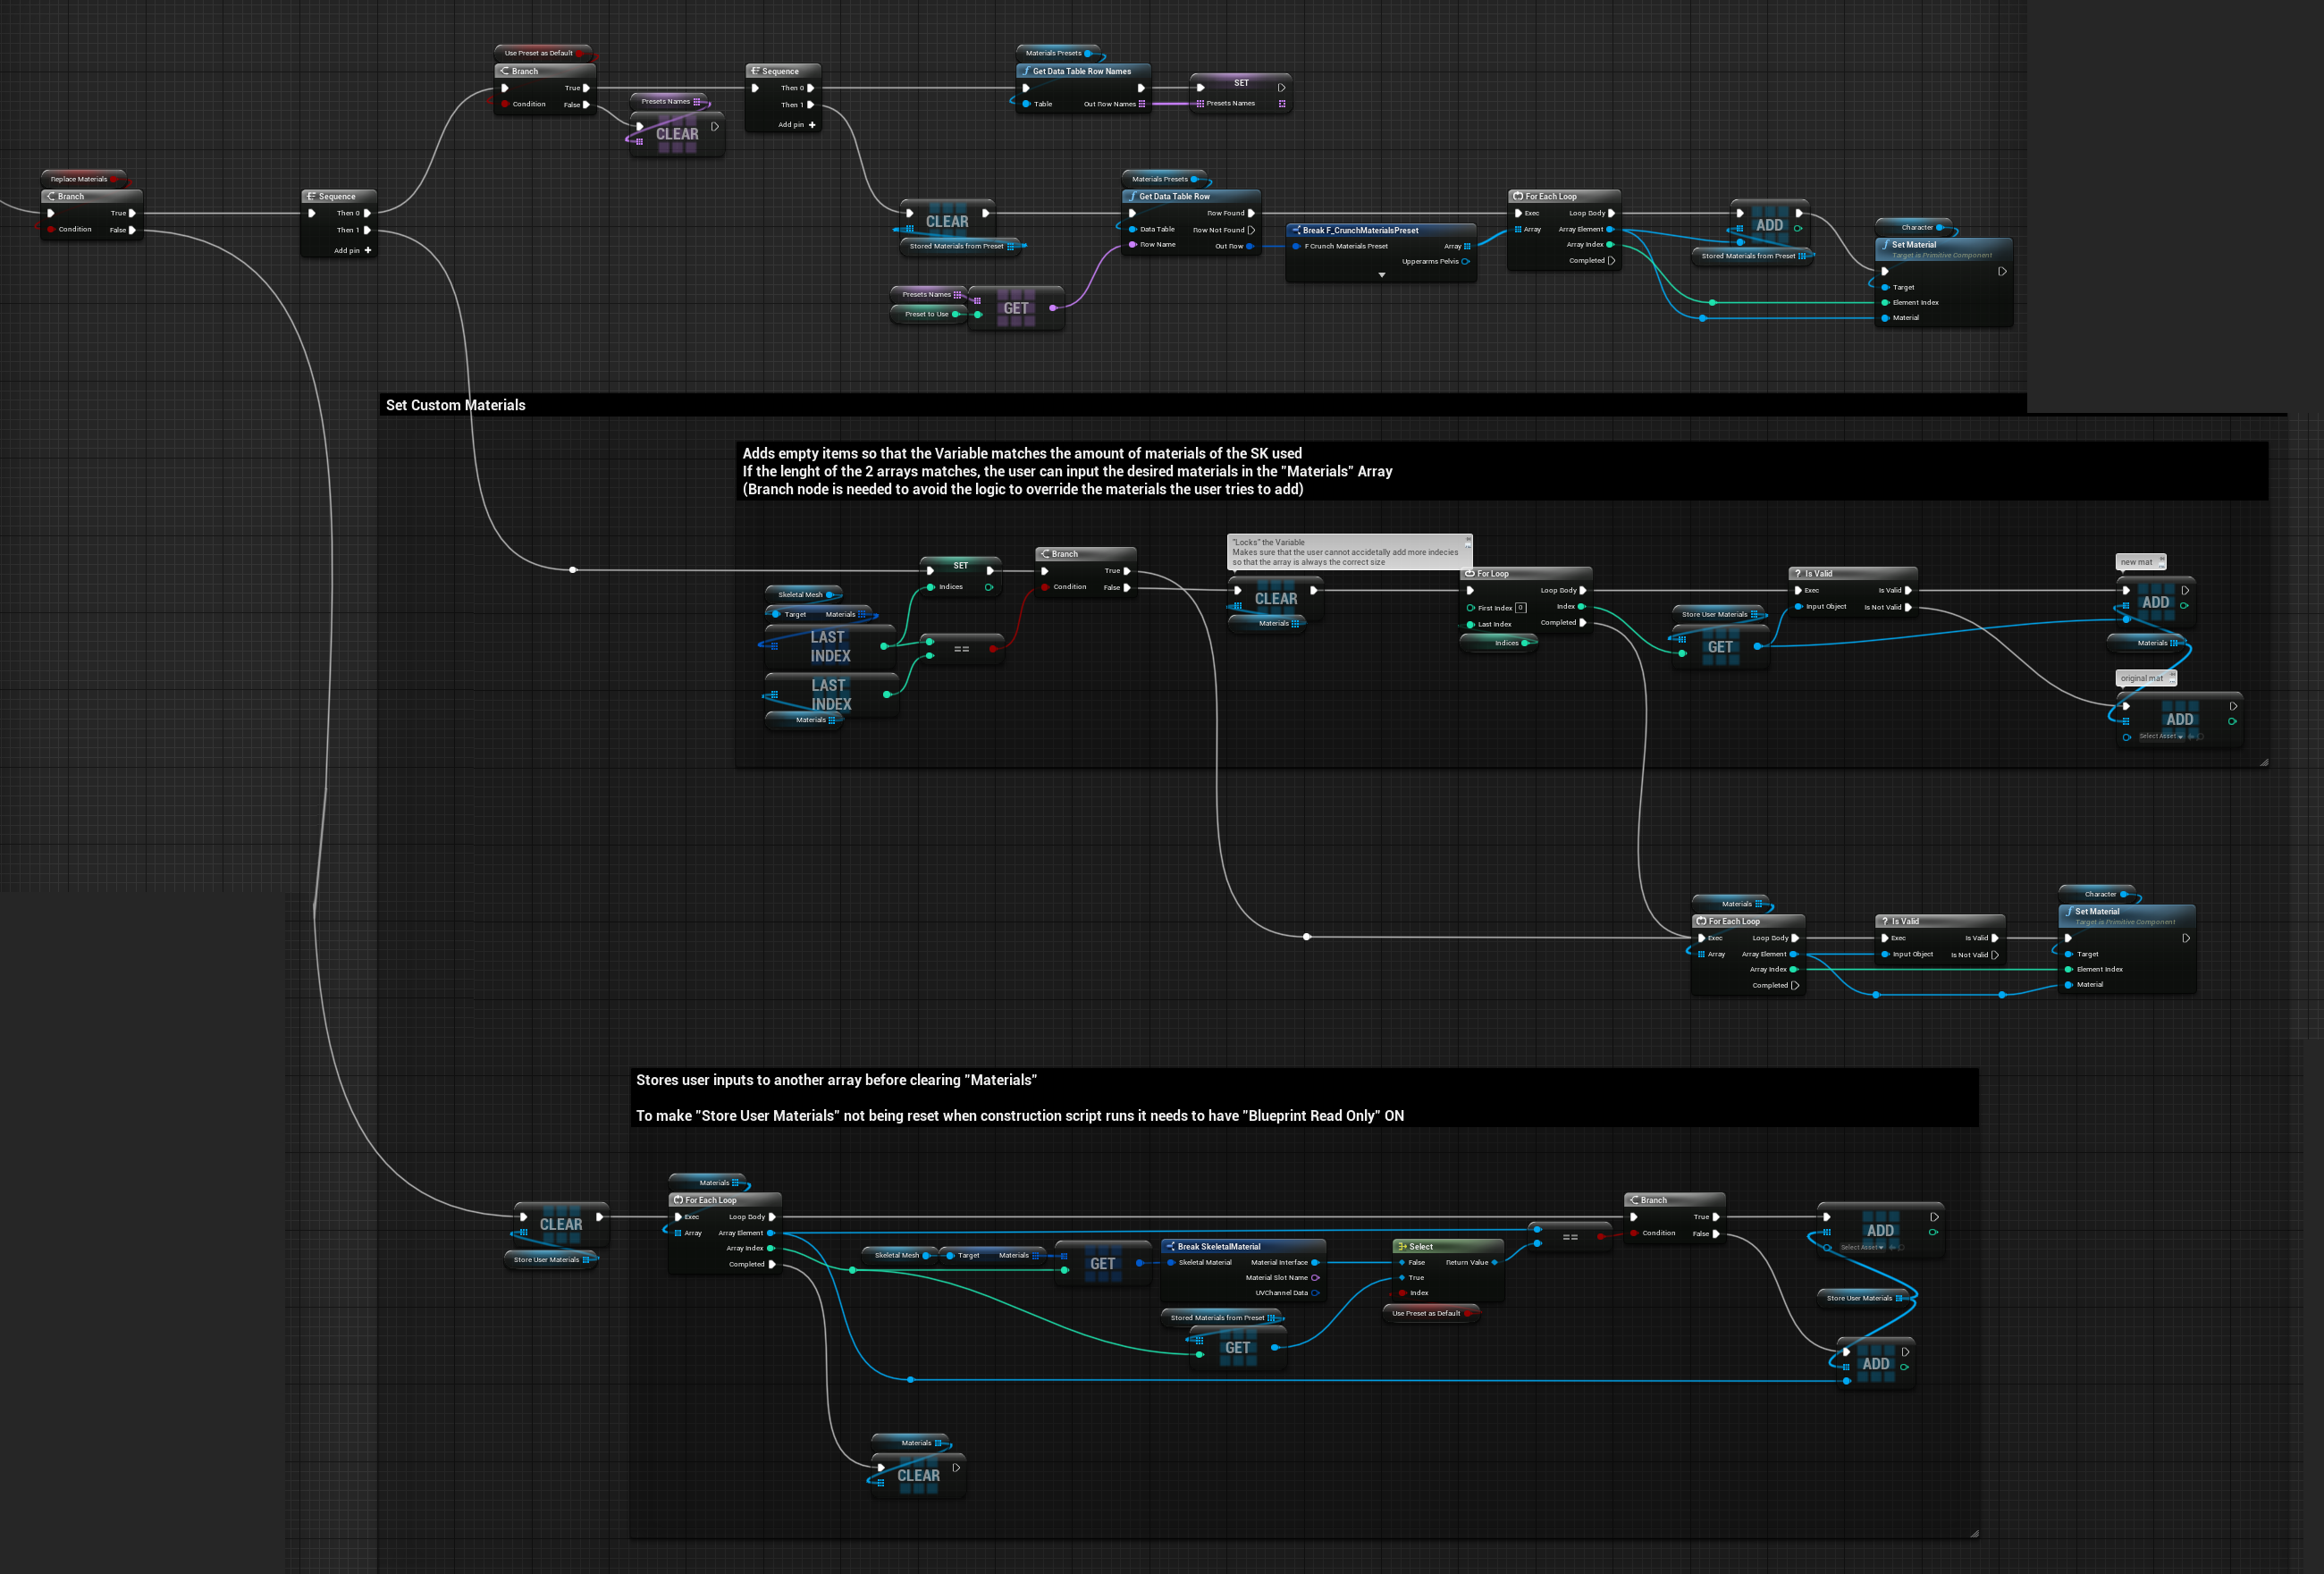
Adding the presets and keeping the previous features was quite confusing, the major issue was keeping both the user inputs materials and populating the slots with the preset’s default materials. To have both features I would need to check if a new presets has been set and when that happens re-initialize the “Materials” array, which could be done only by storing the previous preset number in an integer variable so that it can be compared with the new one. The problem is that the variable gets reset every time the construction script runs making this impossible, the variable wouldn’t get reset if “Instance Editable” or “Blueprint Read Only” were active, but in this case, the “Set” node would be unavailable, it’s not like the arrays where I could still use “Clear” and “Add”.
Conclusion
I didn’t really have a solid plan when I started this exploration, I just kept saying “oh it would be nice if you could also have this”, every time I completed a feature. I should have planned out more what I wanted to achieve, this might have helped with structuring the logic that would have allowed implementing the features in a smarter way. Maybe it could have even been a separate plugin, avoiding working in the construction script, avoiding all the limitations and complications I encountered when trying to make all the features work together, which was really hard to manage.
I, unfortunately, can’t think of many cases where what I’ve done could actually be useful. Especially because it was made possible only by the fact that you can still clear and add items to a Read-Only array.
Having an array that automatically sets its length was a nice addition and also, it was the first time I used data tables, they are really powerful and I definitely would like to explore more in the future.
I hope someone found this interesting!
The assets used for this article are from Paragon’s free content on Unreal Engine’s Marketplace.

Leave a Reply