Intro
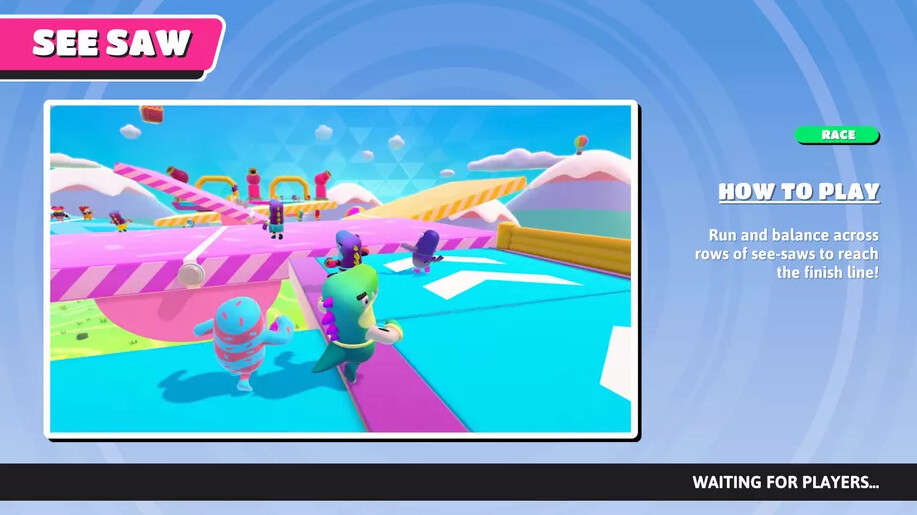
I played Fall Guys recently (who didn’t?), I often die in the first rounds so I find myself staring at the loading screen for ages waiting for the other players. Soon enough I started wondering if I could recreate it in a shader without using textures..
Well, turns out I could and it’s quite simple! I decided to share how I’ve made it since it’s very easy and making circle shapes can be extremely useful for many different shaders.
So with this post, I’ll try to quickly show you an easy way to make circles and expanding rings in UE4’s graph editor.
Technique
Radial Gradient
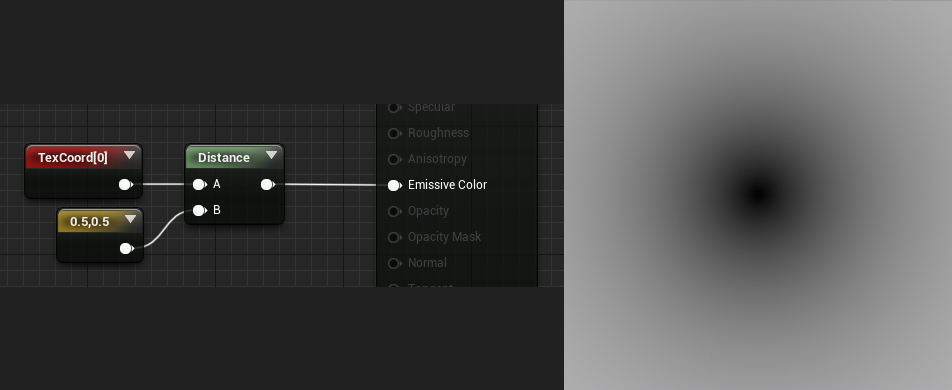
The core logic is very simple, you can get a radial gradient finding the distance between all the UV coordinates and an arbitrary vector2 value, which will be the center point of the gradient.
I don’t really like working with vector2 nodes, especially if I want to expose the values..
This is what I would set up instead:
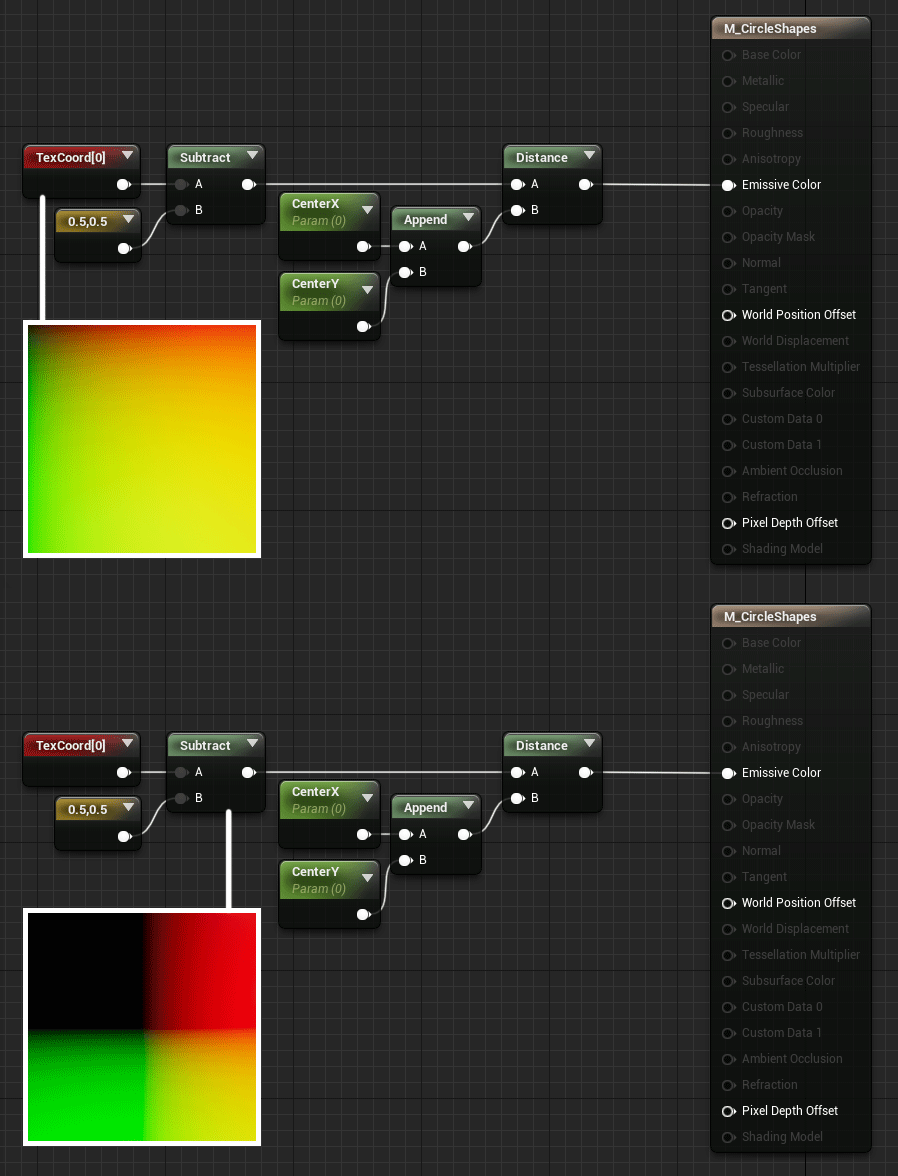
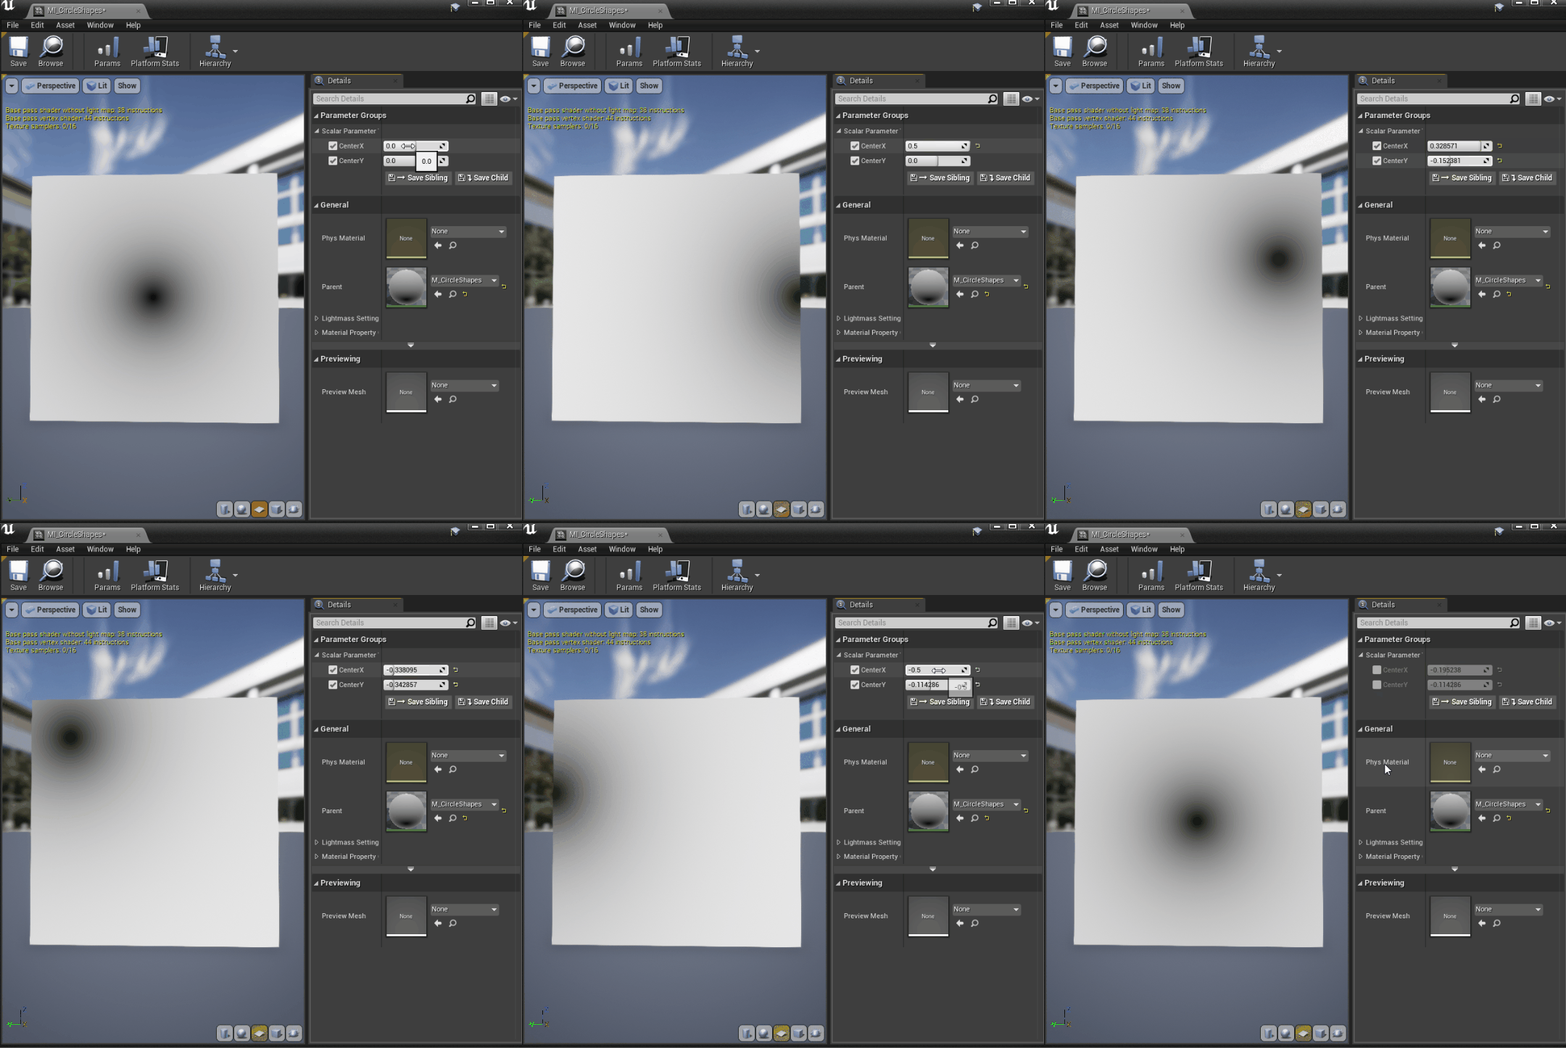
Just a personal preference, I’m offsetting the Texture Coordinates so that I can position the circle at the center using the values 0,0
Circle Shape
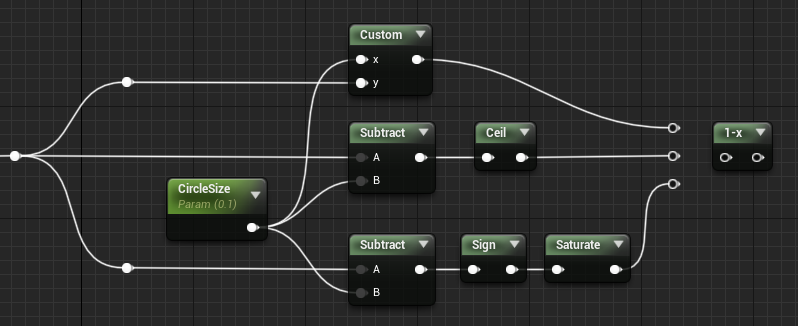
Now we can use a step function to generate the circle and control its size.
You could use a custom node and write your HLSL function:
return step(x,y);However, if possible, is better to avoid custom nodes, since they prevent constant folding (more about it here)
In this case, we can since we are not doing anything fancy and we can achieve the same result in different ways.
You can control the size of the circle using a float, subtract this value from the gradient we previously made and ceil the result or use the sign node instead, but if go for the second option remember to add a saturate node as well since the sign node returns negative values!
OneMinus the result to invert it.
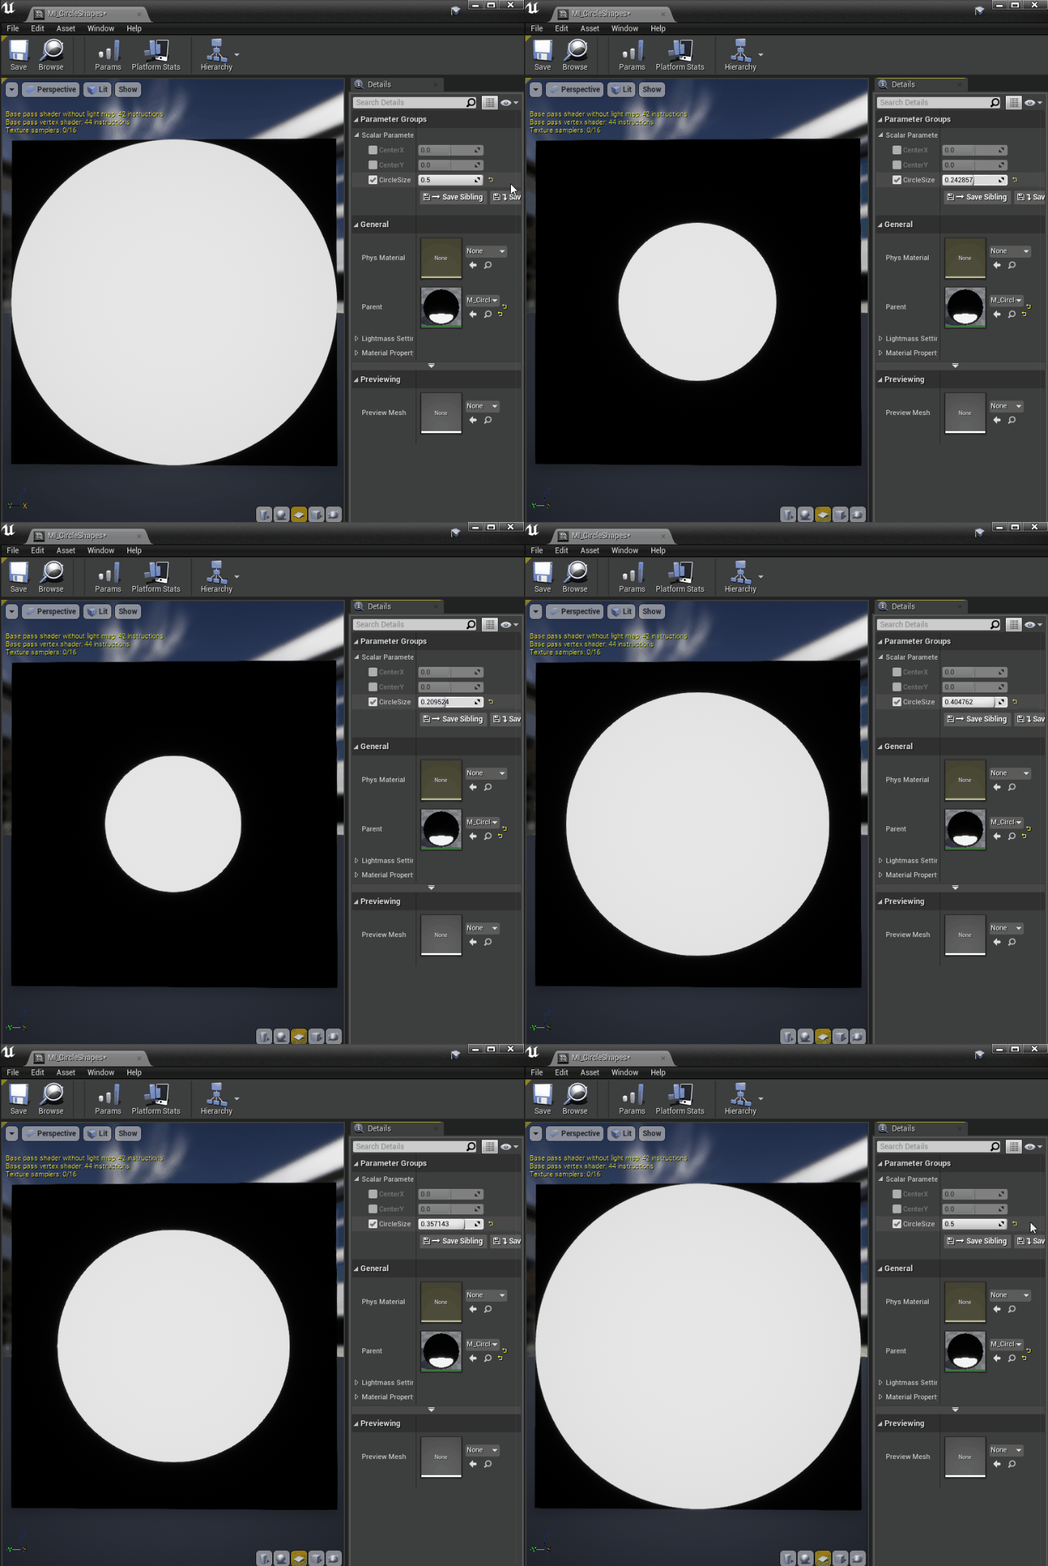
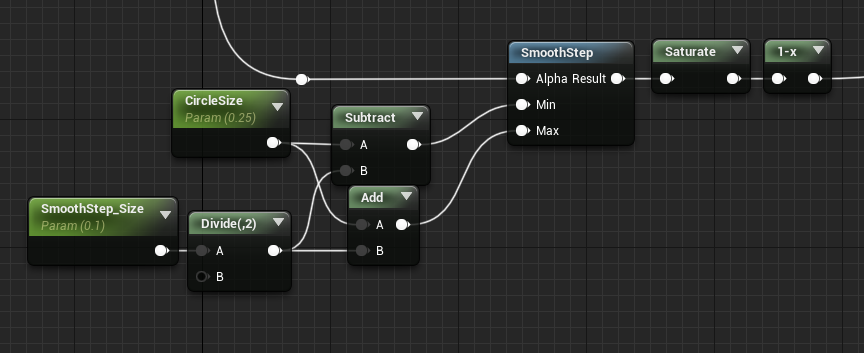
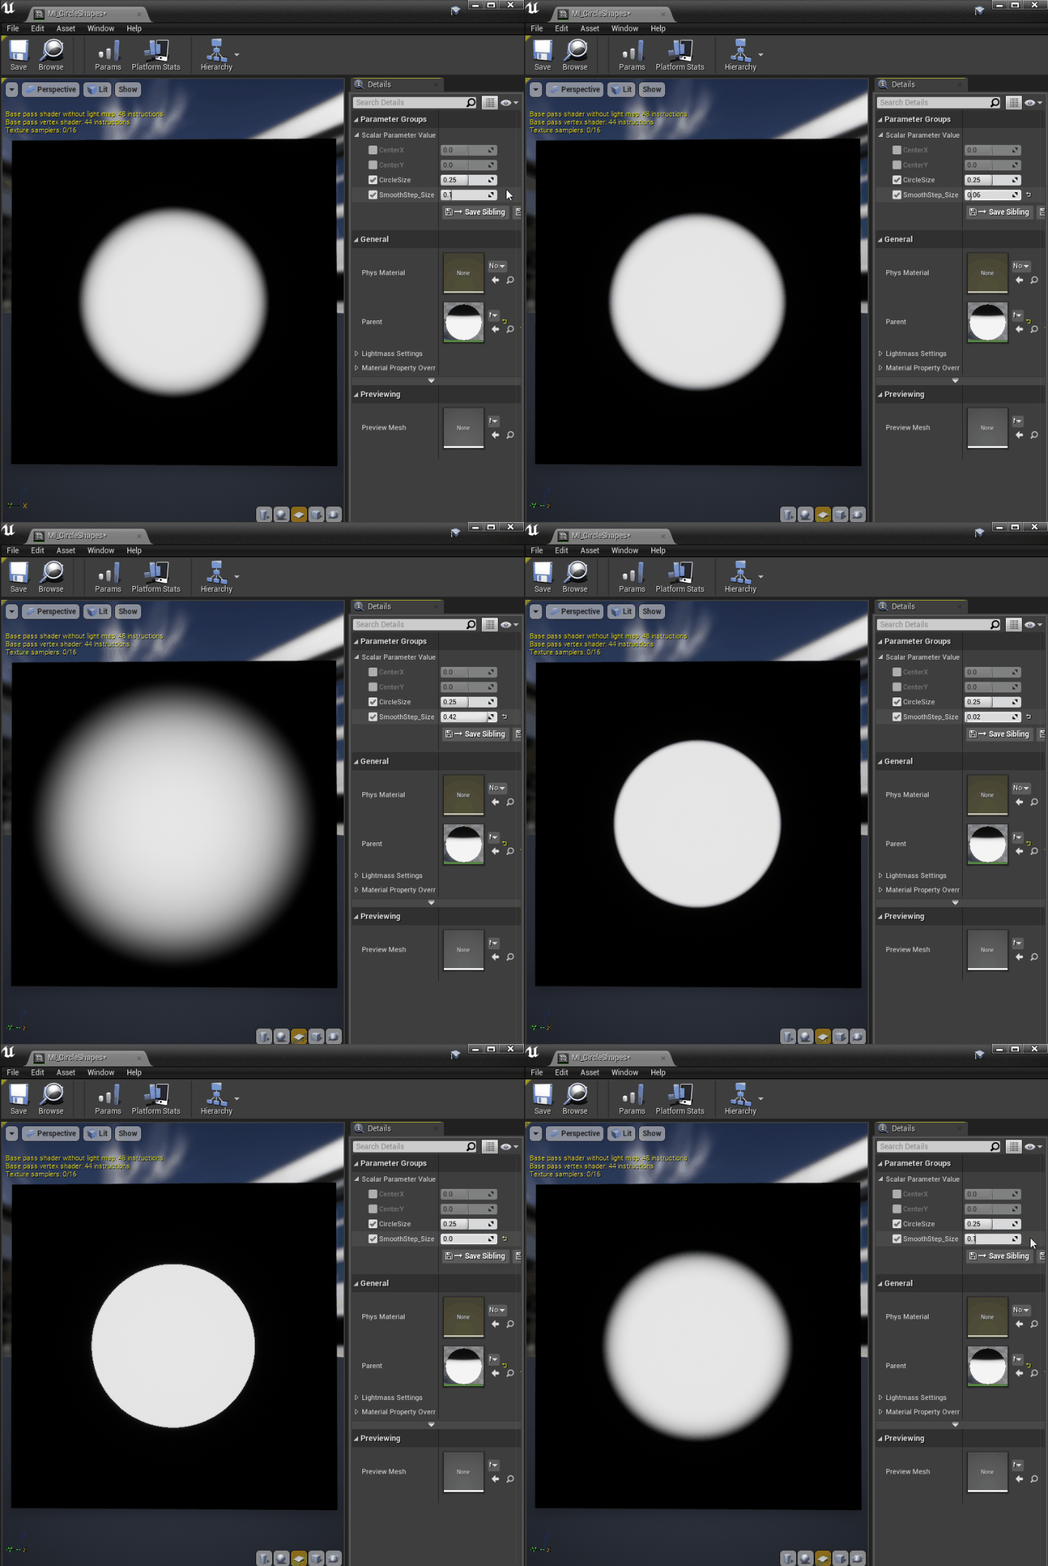
If want to make the edges of the circle softer you can use a SmoothStep function instead, Unreal already has a node ready for us!
Make a scalar parameter for the step size, then subtract and add it to the Circle Size to get the Min and Max values for the SmoothStep node respectively.
This way when you change the Step Size the circle’s edges will get smoother uniformly, inside and outside the circle.
Expanding Rings
If you just wanted to make a circle then you’re done, however it doesn’t move… Boooring!
It really depends on what you’re after, you could animate any of the parameters exposed: its position, radius or even the smooth step size!
Add, or subtract, and then frac Time just before the step or smooth step we made previously.
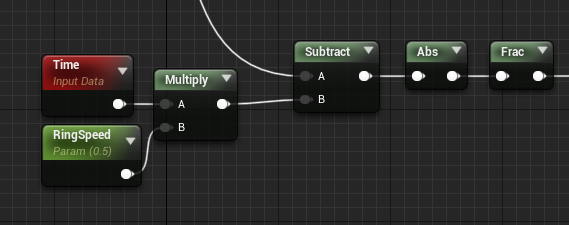
This will transform the circle in an expanding ring, its thickness is still controlled by the scalar parameter we previously made for the size of the circle and multiplying Time you can speed up, slow down, or even reverse the animation.
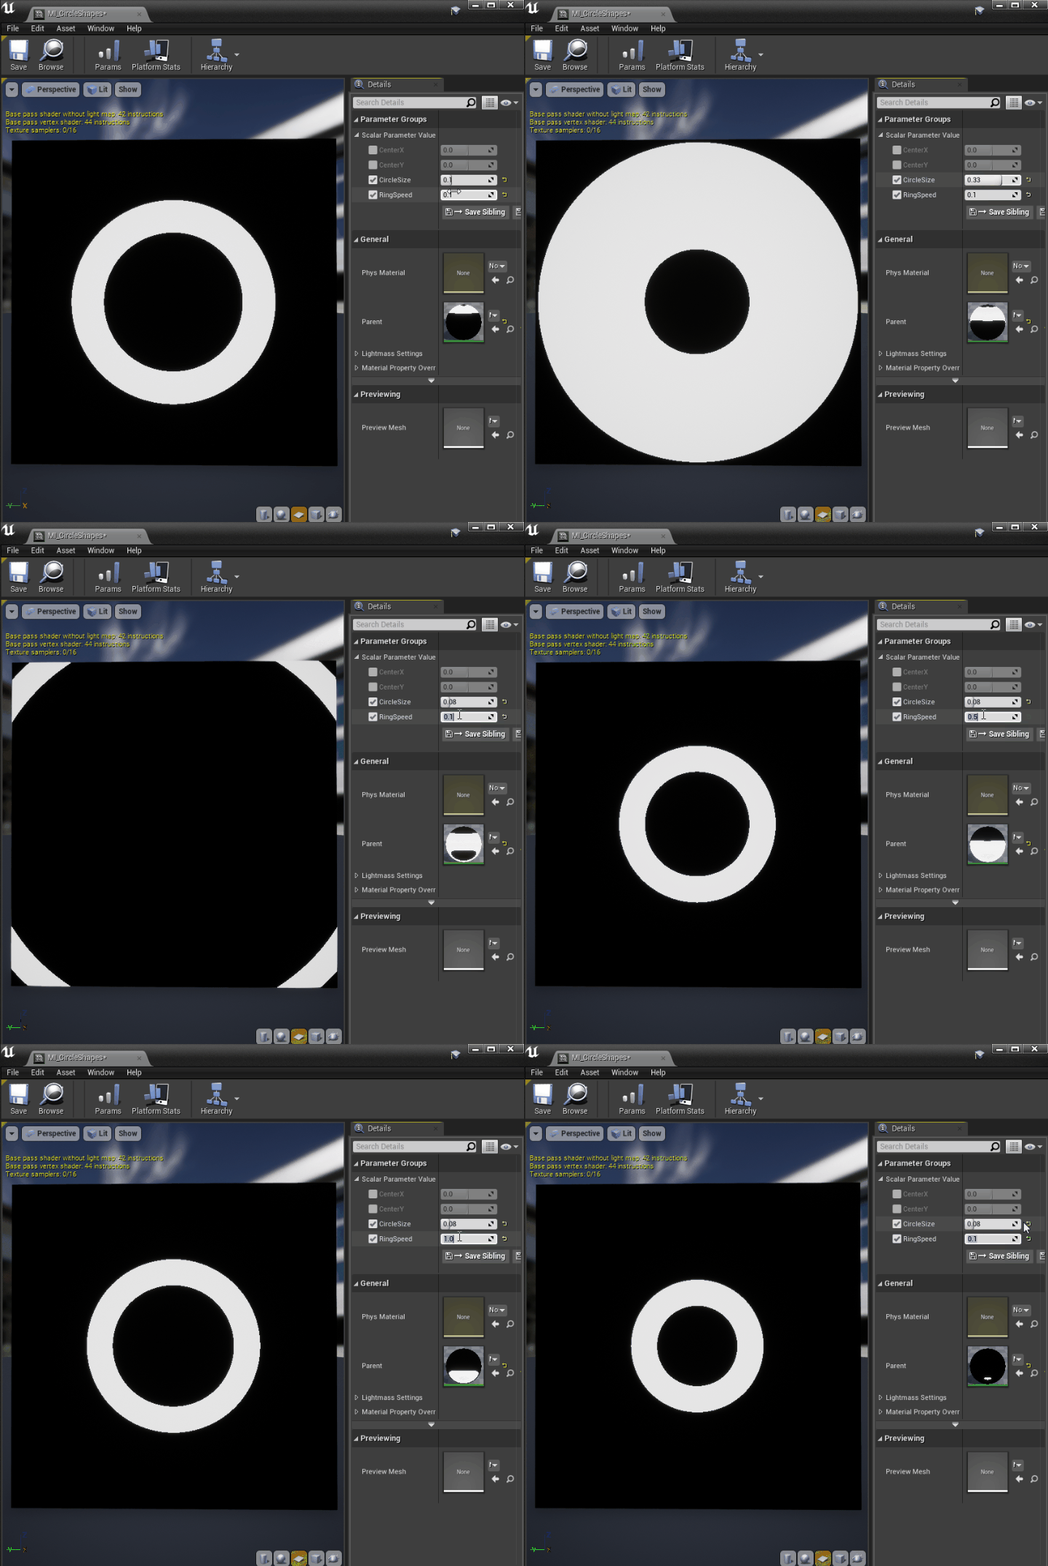
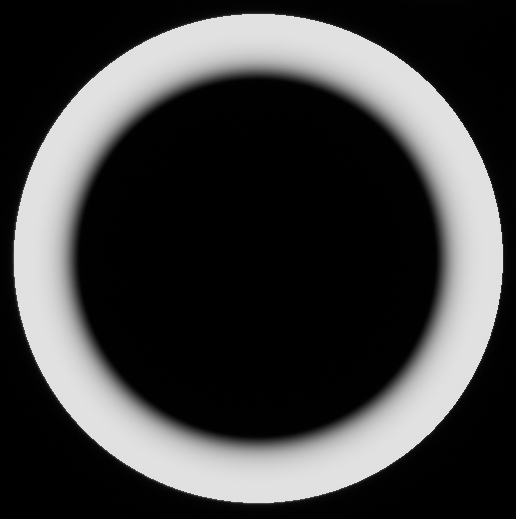
It will work fine with the step logic, but not with the smooth step one since only one of the edges will be smoothed out:
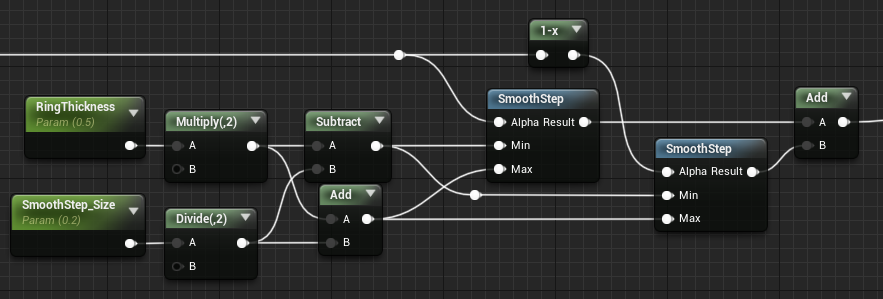
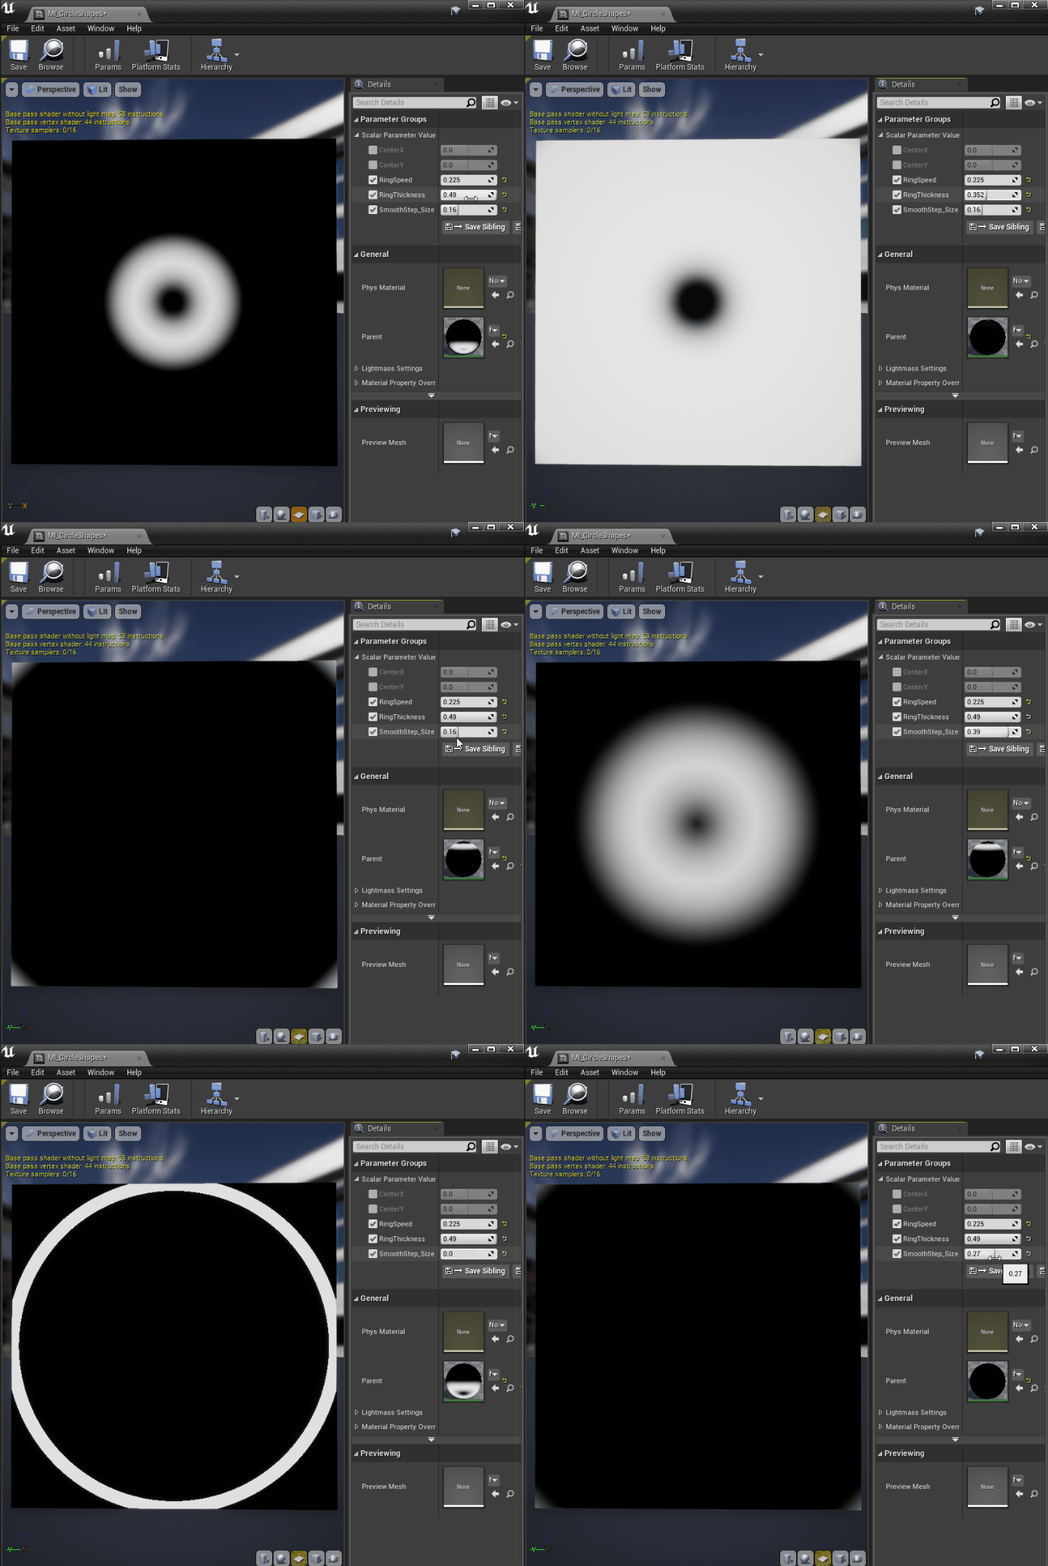
If you want to have them both smoothed you’ll have to add another SmoothStep node, unfortunately.
You can think of the ring as 2 circles one inside the other, so you’ll need SmoothStep for the outer and one for the inner circle.
Fall Guys’ Map Loading Screen BG
Now you know everything you need to recreate a loading screen like Fall Guy’s one!
An overview of the shader I made:
This is the graph:
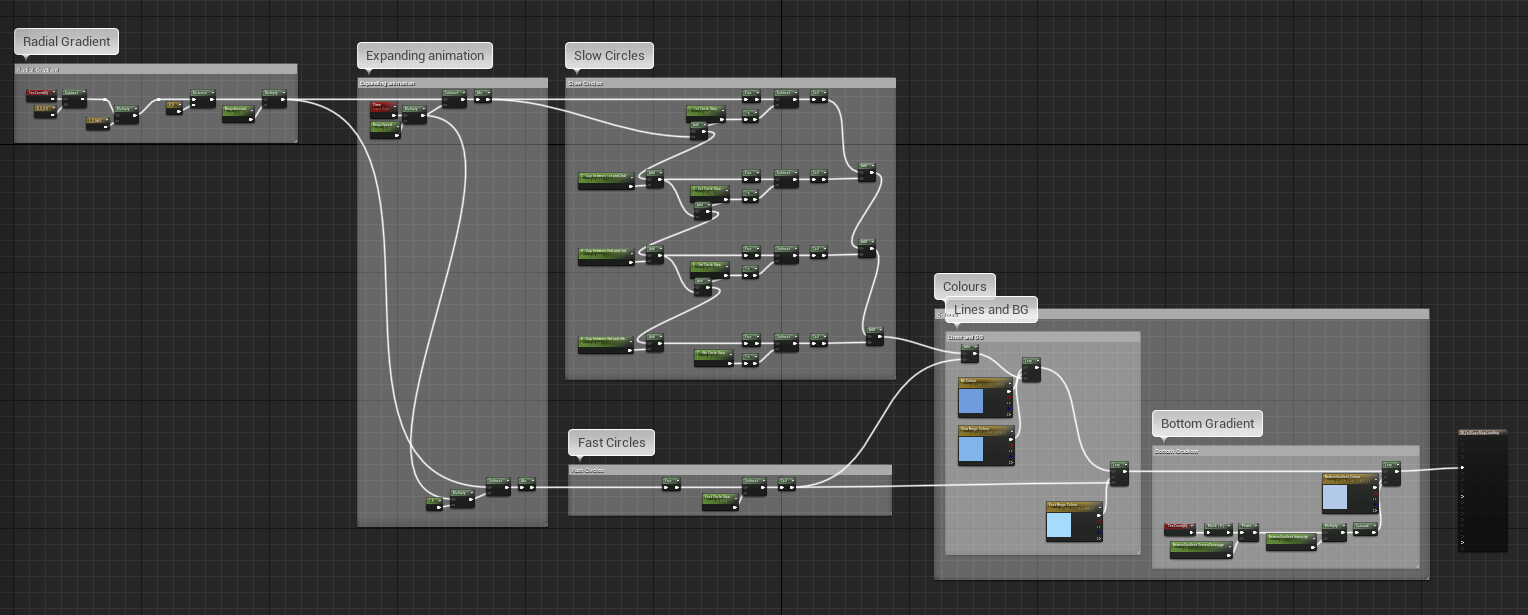
Radial Gradient
Starting with a radial gradient.
The only thing to mention here is that I’m scaling the UVs and the plane mesh I’m using to test to get a rectangle instead of a square.

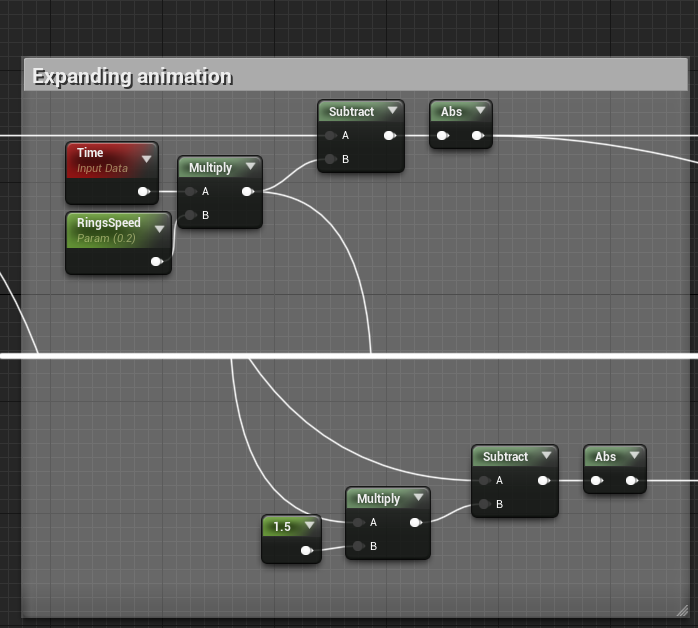
Expanding Animation
Then I’m subtracting Time to animate the rings that I’m going to make.
There are two sets of rings, one set is faster than the other, so I’m multiplying Time by 1.5
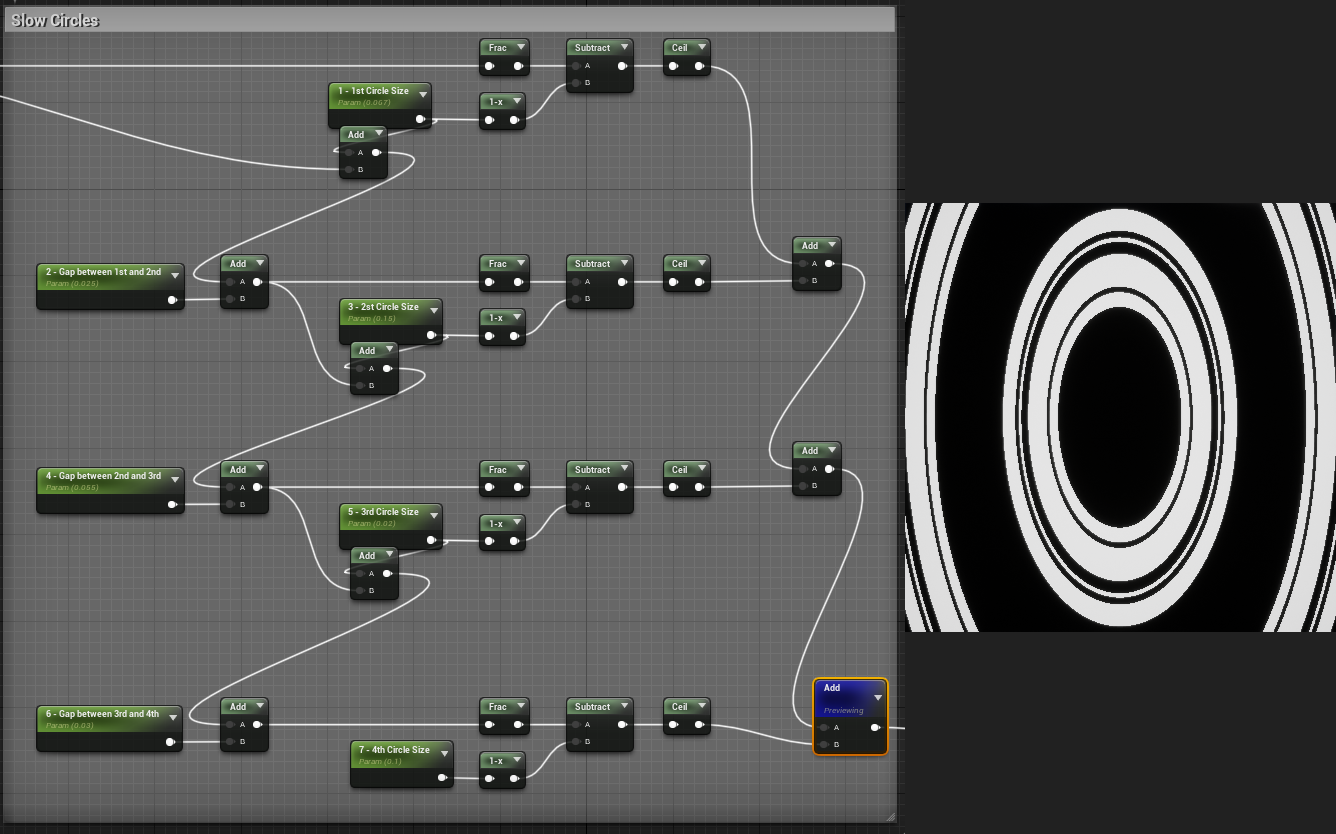
Rings – First Set
In the first set contains 4 rings of different size, the gap between them is also different.
I wanted to make the shader somewhat procedural, so I had to set up a system that scaled everything accordingly if I was changing the thickness of a ring or the size of a gap.
Rings – Second Set
The second set only has one ring, quite straightforward.

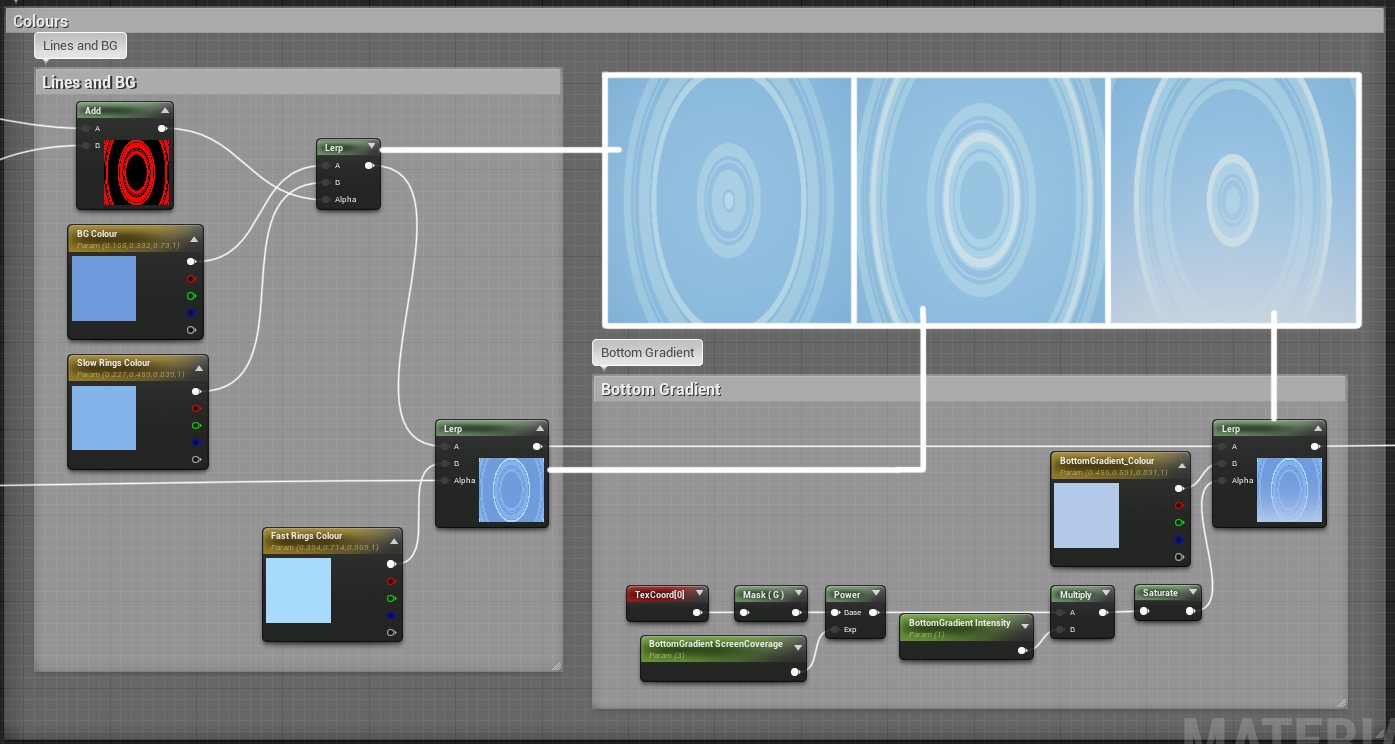
Colour
Then I use the 2 rings sets as masks and add some colour with lerp nodes.
I also made a linear gradient mask using the Green channel of the Texture Coordinate.
Conclusion
I straight-up copied Fall Guys, but with these techniques, you can make a lot of different cool effects!!
Thank you for reading all the way here, I hope it was somewhat interesting!

Leave a Reply